Nurk’s 2017 “Flight of the Year” hooked me on FPV drones. Not a DJI drone packed with idiot proof sensors, but a high speed drone in acro mode, enabling freedom of movement.
So, I made time this summer to build my first quad, a 6″ Armattan Rooster, and the maiden flight was incredible! FPV goggles play tricks on the mind. It felt like I was flying as long as I stood completely still. Yet, my ears heard the drone ripping through the sky. I had to consciously ignore external sounds and focus on eyesight alone. Moving my head or torso was disorienting during while first wearing FPV goggles. But overall, FPV is an awesome experience. I was wired for hours and had trouble falling asleep later that night. Must fly more.
I’ll throw out wild acronyms in this log. See Ethix’s “Bible”.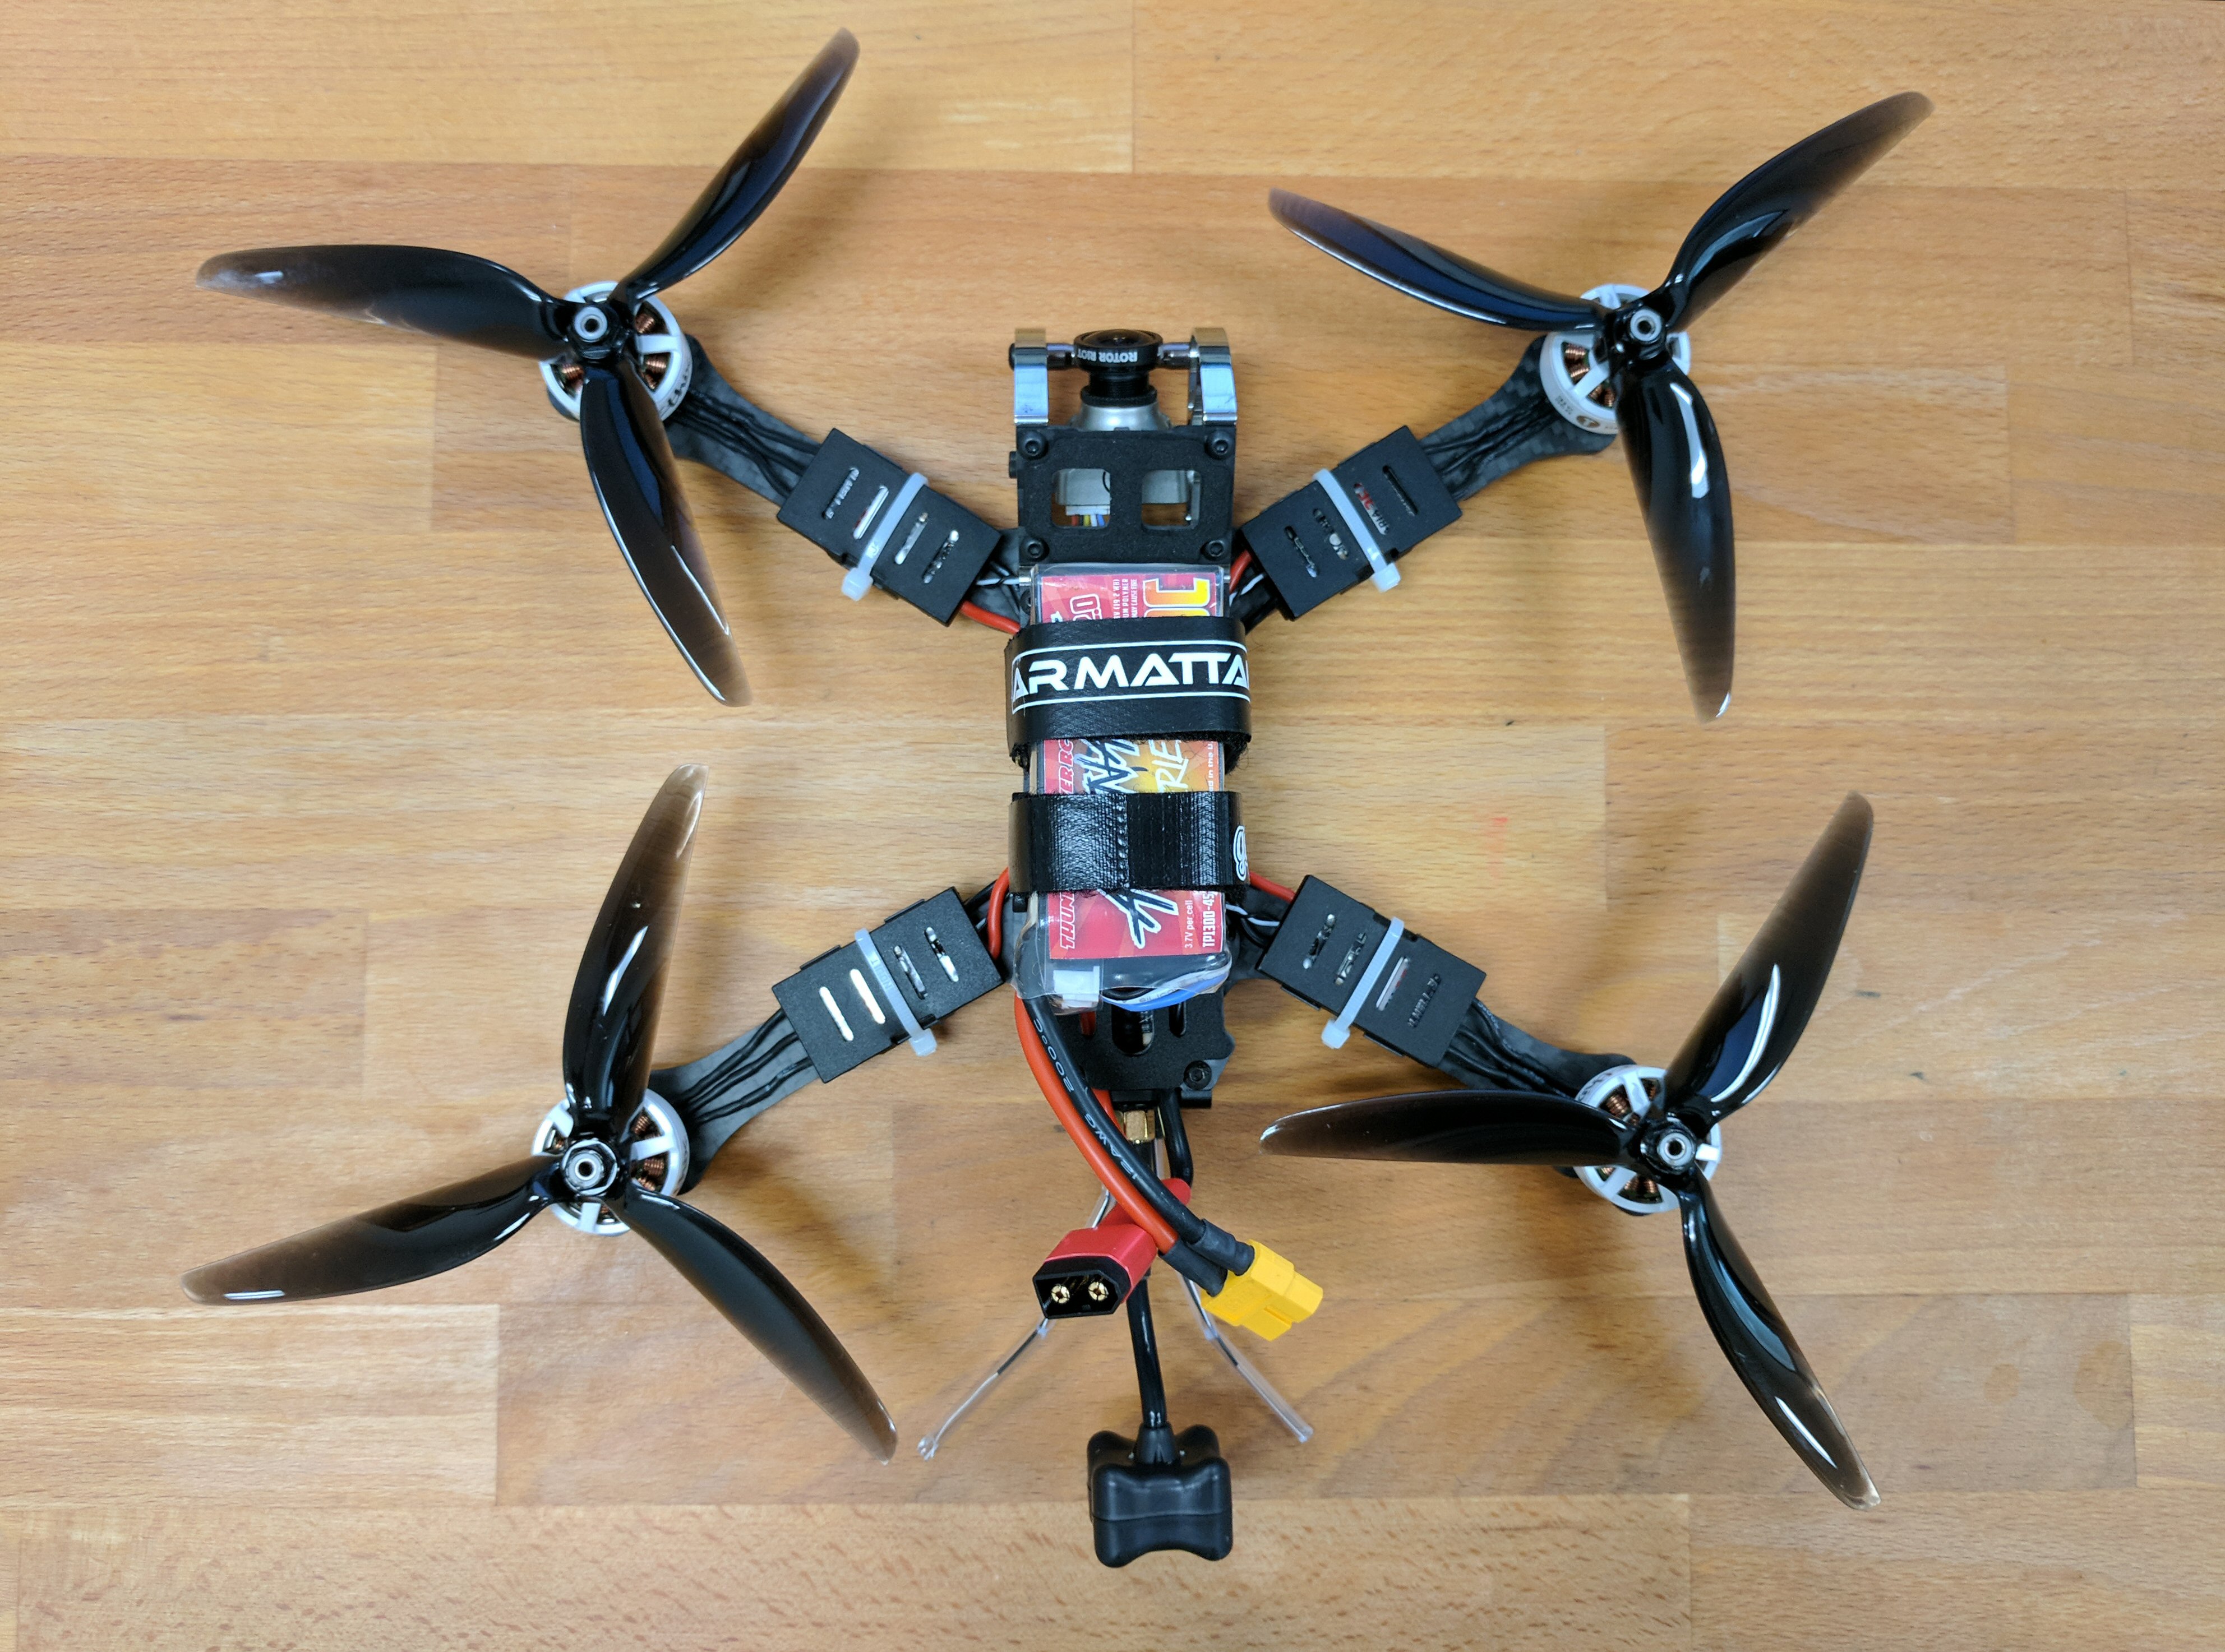
FPV Drones in a Nutshell
When I first saw Nurks’ video, I assumed his DIY drone must be the gear to have. Then I noticed other top pilots all had unique setups. Yeah, it’s a lot like any hobby. Gear is mixed and matched to suit a particular style. FPV can be broken down into these parts:
- The base drone: A frame, 4 motors and props, 4 ESCs, a FC, a battery, and:
- The Video Transmitting system: A camera, a VTX board (usually 5.8Ghz), an antenna, and usually 1 or more OSDs
- The Control Receiving system A receiver board (usually 2.4GHz) that must be matched to your transmitter, plus antennae
- Video Receiving system: The video goggles on your face, usually with a separate receiver module and 1 or 2 antennae
- Control Transmitting system: The remote control in your hands
Joshua Bardwell maintains helpful recommendations in his Ultimate Shopping List, and his YouTube channel is a fine resource (thank you!).
Build Priorities
I initially planned a low cost quad sourced from Banggood, to get over the FPV learning curve. After gaining confidence on the sticks in FPV Freerider and watching too much FPV on YouTube, I realized I’d rather start with robust parts and support pilots like Le Drib and Mr. Steele. This freestyle build focuses on:
- Frame durability
- Electronics reliability
- Clear video
- Strong motors
Parts Selection
Crossposted to RotorBuilds. Disclaimer: There are no disclaimers. I’m not sponsored, endorsed, or affiliated with any company or individual mentioned herein. This is just a personal build log.
Frame |
Armattan Rooster 6″ | $95.00 |
Flight Controller |
CL Racing F4S v1.5 Flight Controller PDB OSD AIO | $34.99 |
ESCs |
4 x DYS Aria BLHeli_32bit 35A ESC | $63.96 |
Motors |
4 x ETHIX Mr Steele SILK Motor V2 | $107.80 |
Propellers |
Lumenier 6x5x3 – Gate Breaker Propeller (Set of 4 – Transparent Black) | $3.99 |
FPV Camera |
RunCam Swift Rotor Riot 2 Special Edition – Silver | $44.99 |
FPV Transmitter |
TBS Unify Pro 5G8 HV (SMA) | $49.99 |
Antenna |
TBS Triumph 5.8GHz RHCP FPV Antenna Set (SMA) | $39.99 |
Receiver |
FrSky XM+ SBUS Mini Receiver | $12.99 |
Batteries |
Thunder Power Adrenaline 1300mAh 4S 100C Lipo Battery | $28.99 |
Transmitter |
FrSky Taranis Q X7 2.4GHz 16CH Transmitter (Black) | $104.99 |
Misc Parts |
iSDT Q6 Lite Smart Charger | $49.99 |
| Black XT60 Power Connectors (5 Pair) | $4.99 | |
| Fat Shark Dominator HD3 Core FPV Goggles | $399.99 | |
| 2 x FrSky M7 Hall Effect Sensor Gimbal for Taranis Q X7 | $35.98 | |
| ImmersionRC rapidFIRE w/ Analog PLUS Goggle Receiver Module | $149.99 | |
| Armattan Rooster Session Mounts | $15.00 |
Transmitter
I struggled with throttle management in the simulator, mainly due to the default notch tension on the stick. Upgrading to FrSky’s M7 hall effect gimbals was a great help. At the very least, take the time to customize your transmitter’s sticks (adjust/bypass notches and tension). You don’t want physical controls to get in the way of new muscle memories.
FPV Goggles & Receiver
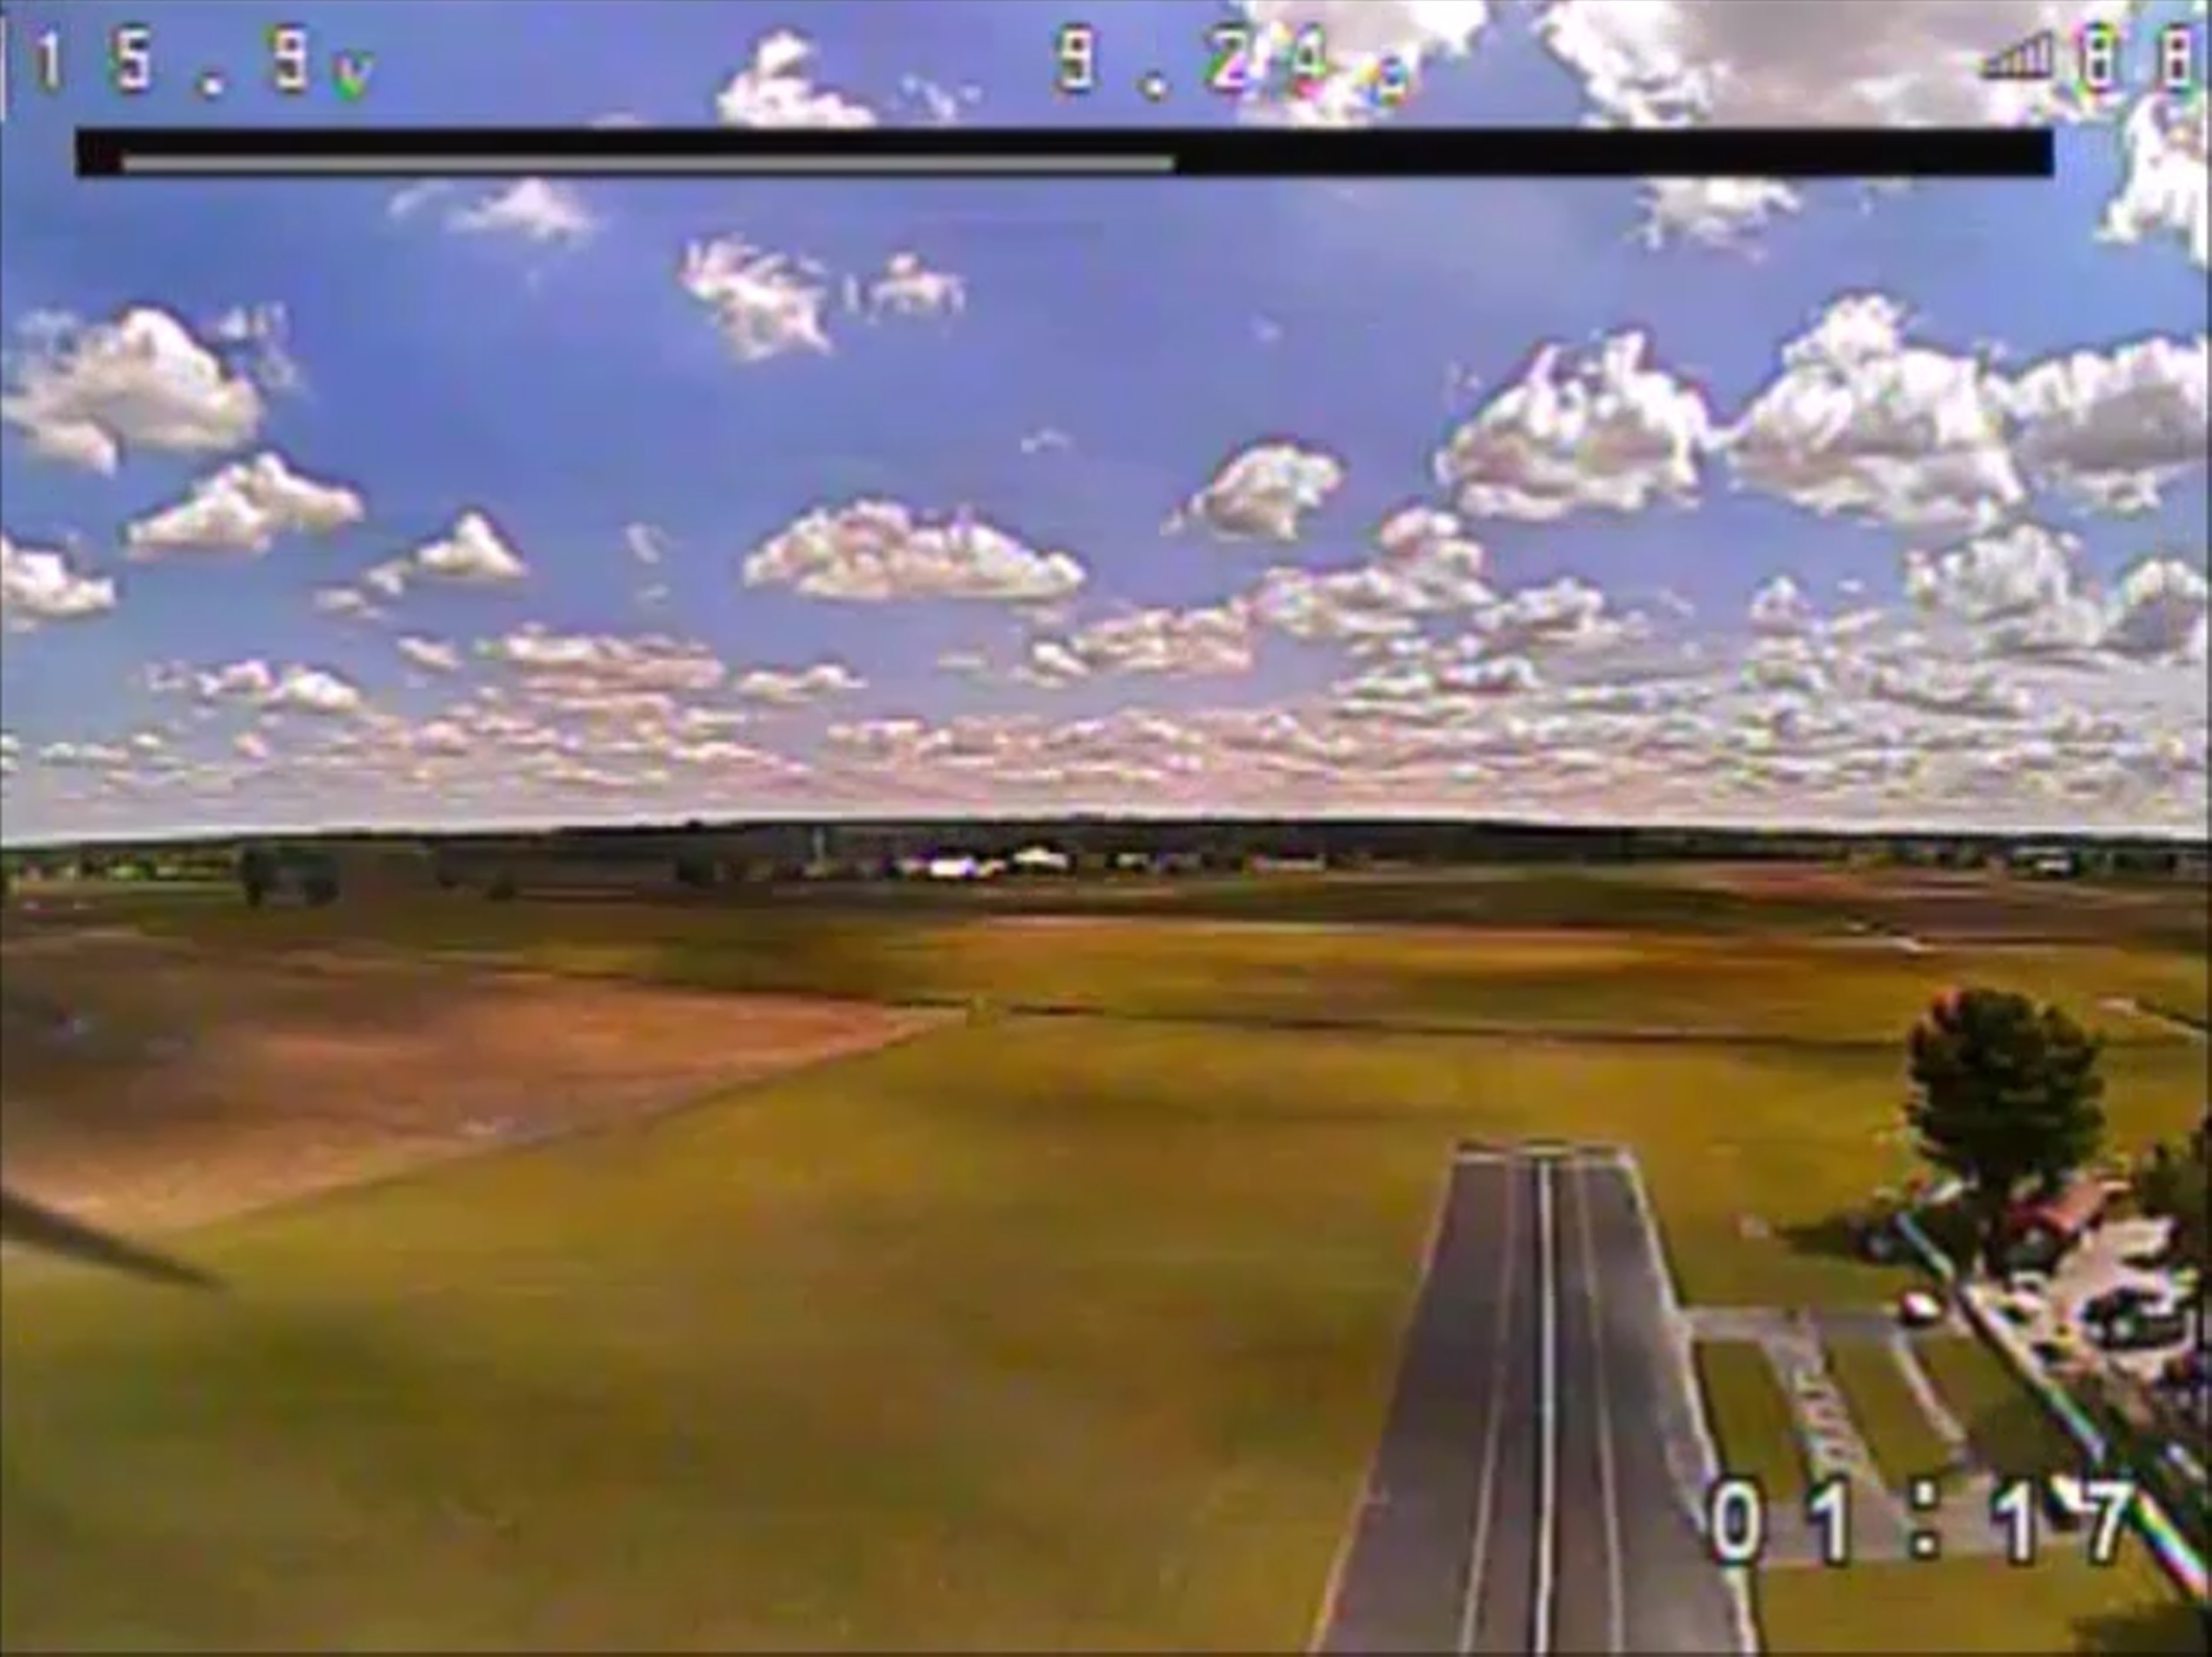
I found a set of used FatShark Dominator HD3’s and paired with the new ImmersionRC rapidFire 5.8Ghz receiver module. The receiver interface is intuitive and video transmission is clear.
FatShark 5V L1 Mod?
The previous owner of the HD3’s had already performed the L1 mod required by power hungry receivers like rapidFire and Clearview. Unfortunately, I’m finding this mod only works when the goggle battery is almost fully charged.
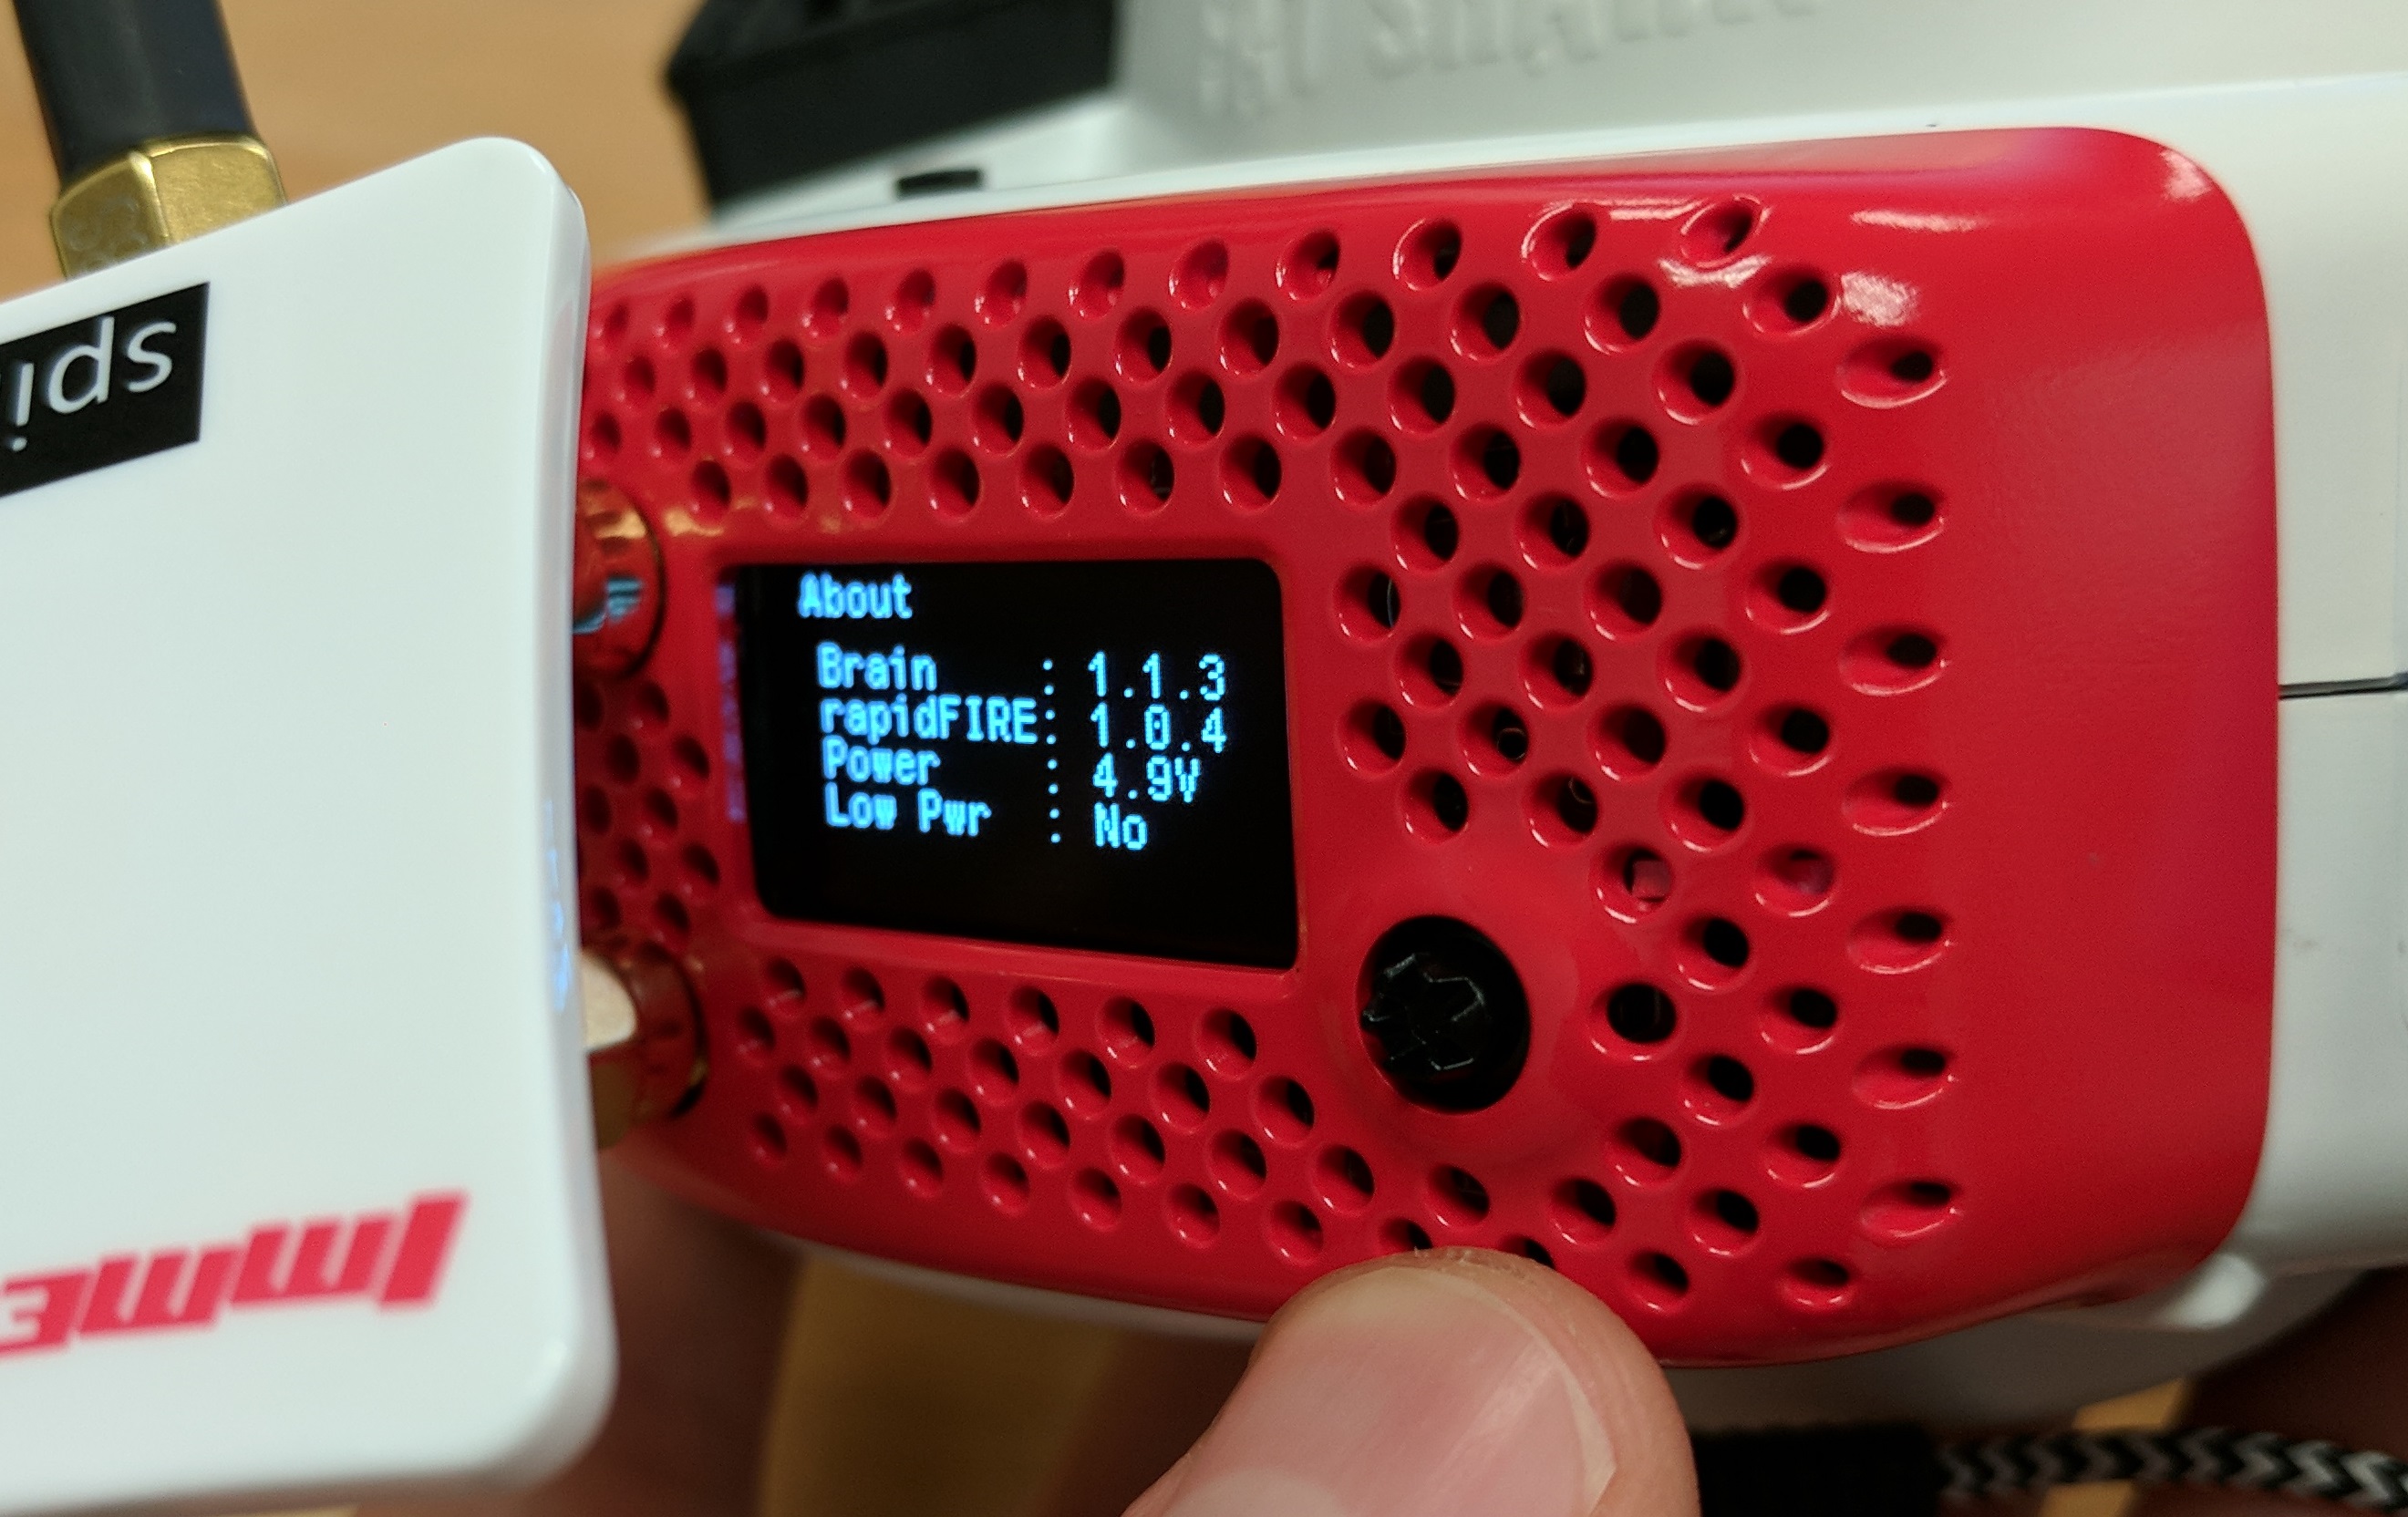 The rapidFire reports 4.9V with my Fat Shark battery just off the charger. After 30-45 minutes of flight time, and the google battery at ~80%, the 5V line drops below 4.5V and the rapidFire emits a beep as it enters Low Power mode (bottom antenna gets disabled).
Video quality is cleaner and range is much further in high power mode, so for now, I just have to keep the FatSharks charged up. Hopefully a new battery will extend high power mode to 1-2 hours.
Some have suggested also bypassing L10. If the new battery still yields poor run time, I’ll build an external 5V supply for the receiver, drawing power directly from the battery.
Receiver
Range was a noob concern, until I read that the FrSky XM+ reaches up to 4km line of sight. Plenty for freestyle.
Video Transmitter
The TBS Unify Pro 5G8 HV was an easy choice. The Mach 2 looks equally impressive at half the cost…
Flight Controllers
Overwhelming choices. I was tempted to go for a KISS v2 setup, but lack of OSD at that price was a turnoff. Sure, I could add a PDB w/OSD, but KISS 32A ESCs pushed the FC+OSD+ESC bill to $240, versus only $100 for a solid Betaflight FC w/OSD and DYS 35A ESCs.
CL Racing’s F4S v1.5 is one of the highest customer rated FC’s at this time on GetFPV. So far, I’m impressed. No issues at all; just smooth flying, even for a novice like me. I disabled Blackbox logging out of the box since I’m not using the feature and some have expressed quirks related to logging.
Motors
It was a tossup between the Ethix Silk Motor V2s, Hypetrain Le Drib Ed, and TMotor F40 PRO II’s. All were similarly priced. The $10 options were also tempting (DYS, Racerstar), but if I remember anything from R/C cars in the 90s, more expensive motors were always more fun. Hopefully that’s still true.
Rooster Assembly Notes
Mounting the Receiver
The XM+ is absolutely tiny. However, the Rooster seriously lacks space towards its rear. I could either mount the VTX, or the receiver comfortably, but not both. I considered attaching the XM+ beneath the battery plate, or near the camera, but antenna placement was optimal in the rear. I resorted to padding the receiver with a second piece of clear heatshrink, then halfway sandwiching it between two layers of carbon fiber, followed by hot glue.
In hindsight, the receiver might have fit more easily beneath the FC using zipties+heatshrink to position each antenna. If you’ve devised a better solution, please share!
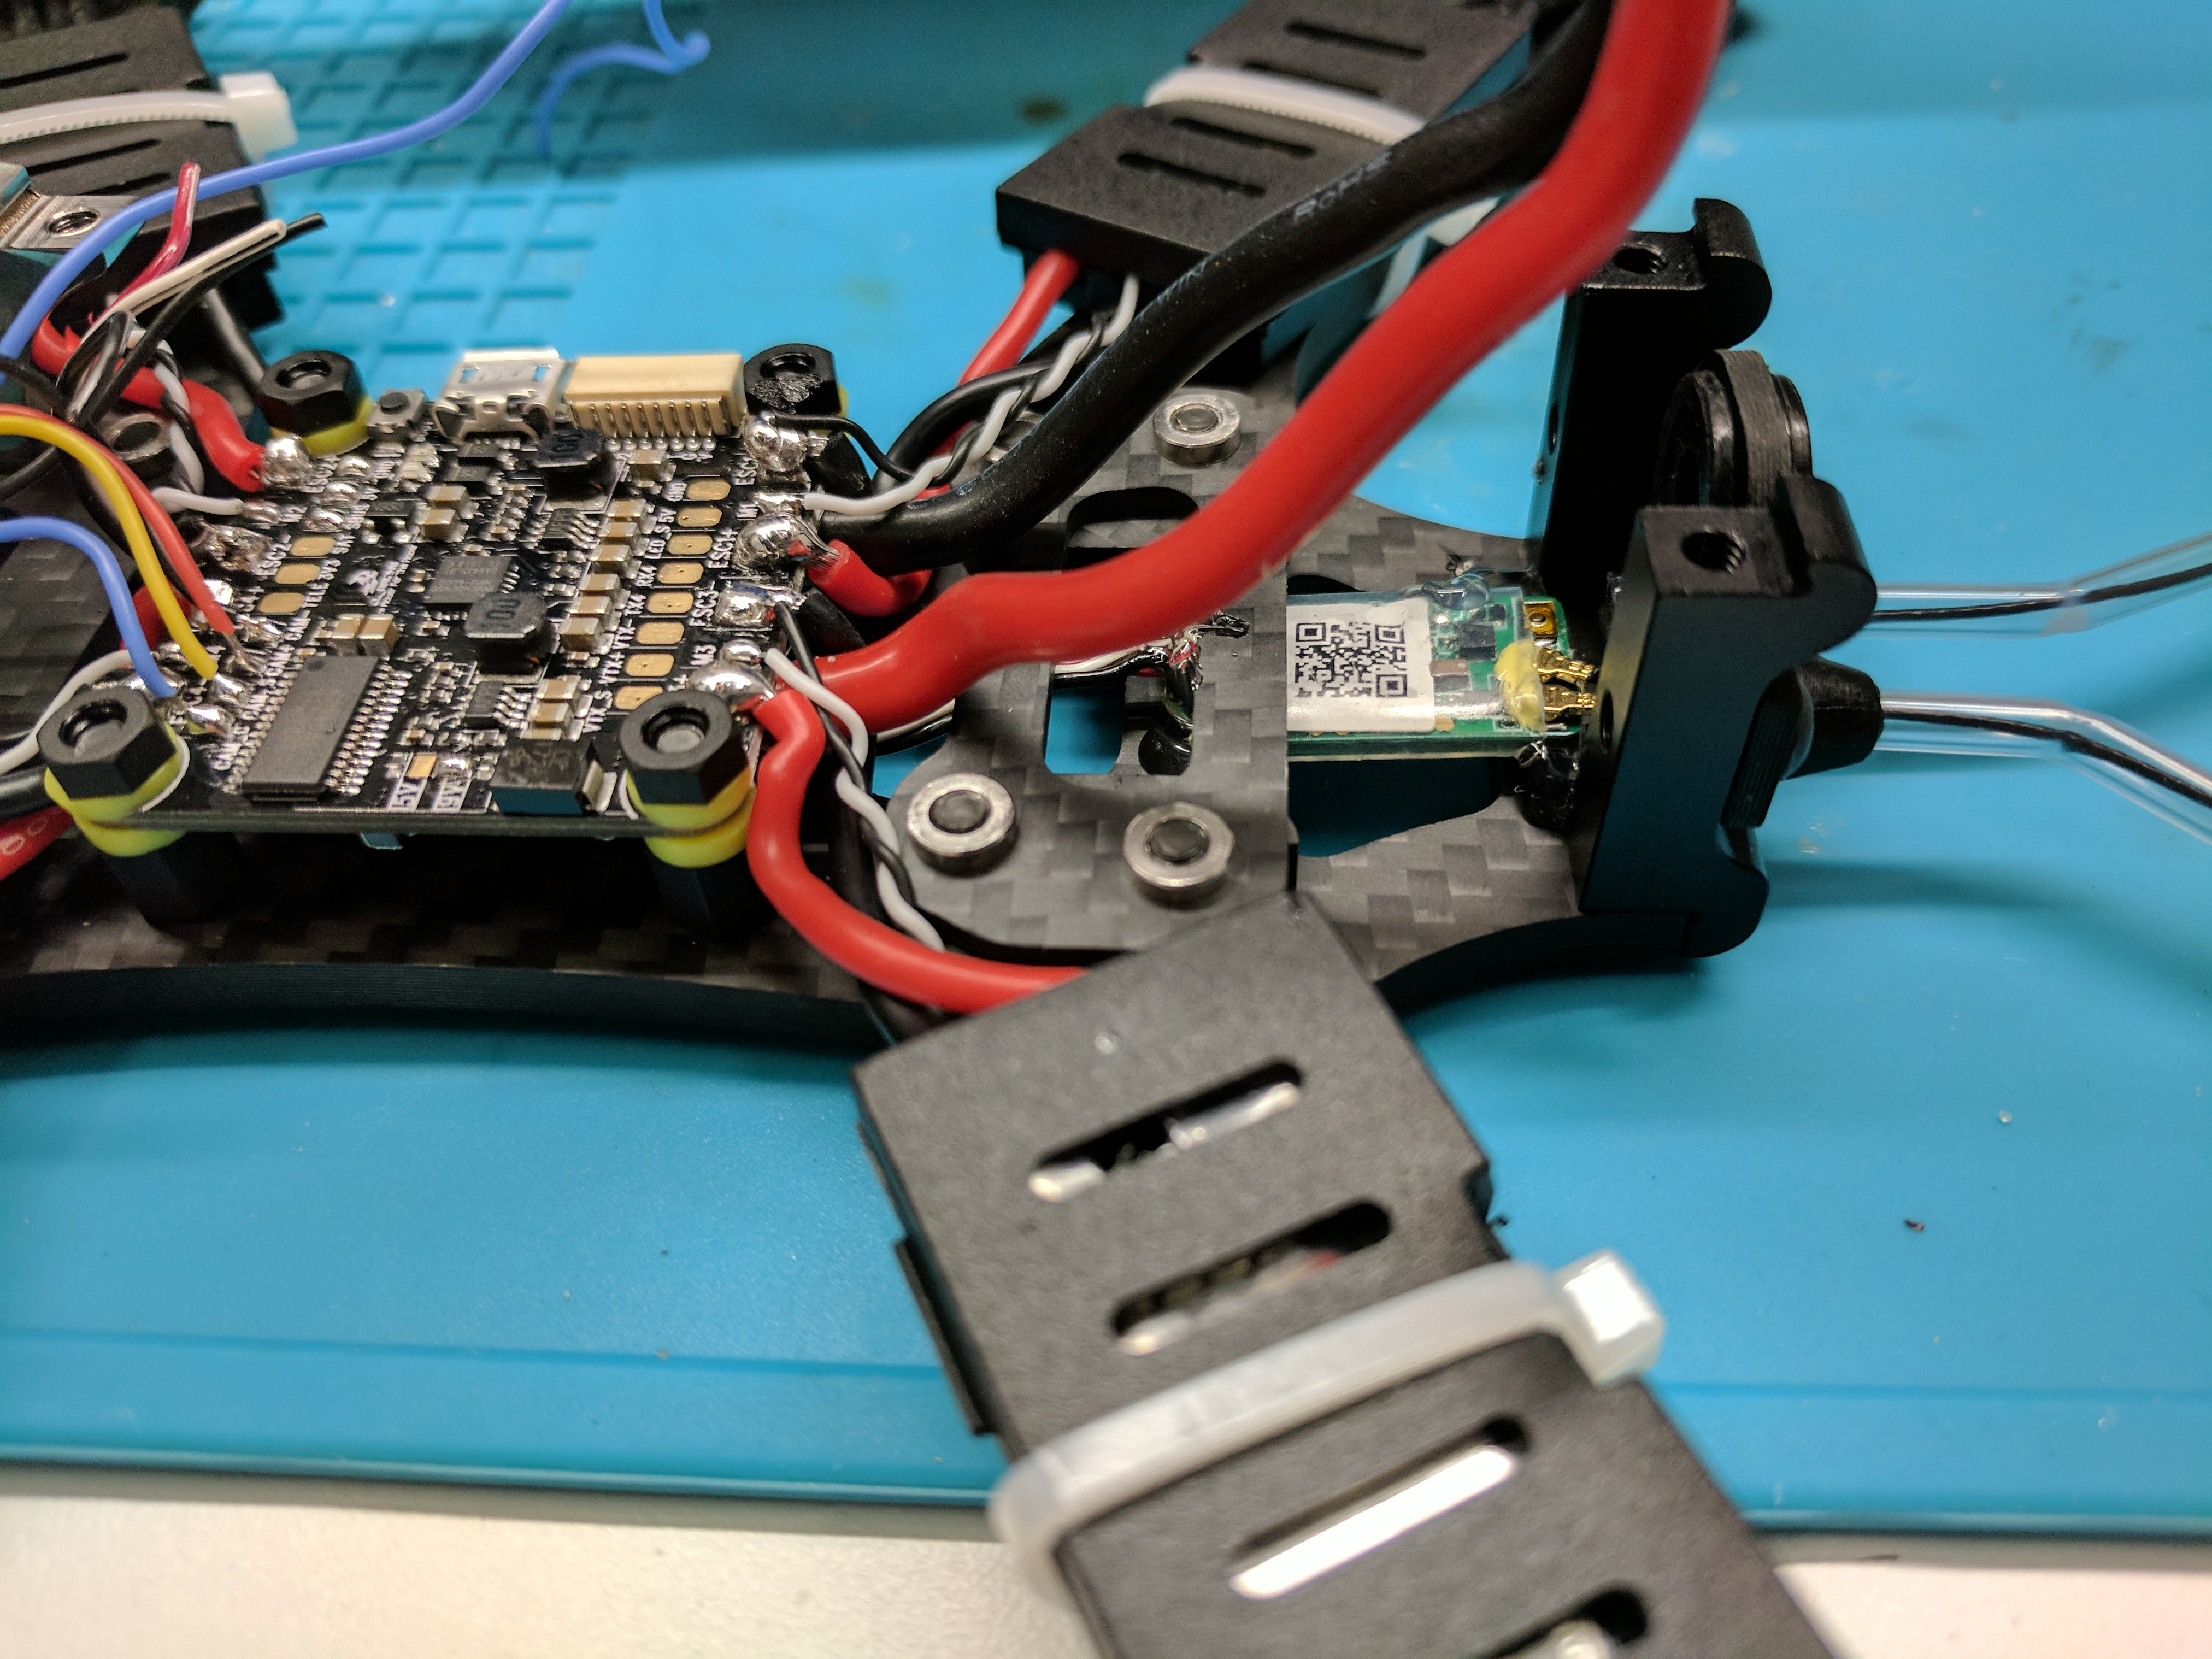
Enabling RSSI from FrSky XM+
While the FrSky XM+ does not support telemetry, RSSI output is supported over SBUS with the latest firmware, and can be displayed by Betaflight’s OSD. Just make sure to flash the XM+ before soldering into your flight controller. My XM+ arrived without serial RSSI support and needed an update.
To summarize the flashing process:
- Load firmware onto an SD card and insert SD card into your QX7 transmitter
- Hardwire XM+ to the QX7’s serial/5V/GND port
- Power on the QX7 transmitter, then hold menu button, press Page to view contents of the SD Card
- Select the firmware file with Enter button and choose Flash
Mounting the Camera
Pay careful attention to which cameras fit your frame. I accidentally ordered a Foxeer Micro instead of Foxeer Mini, only to discover there is no straightforward way to mount a micro sized cam in the Rooster frame. The RunCam Rotor Riot Edition Swift 2 fits the Rooster without modification.
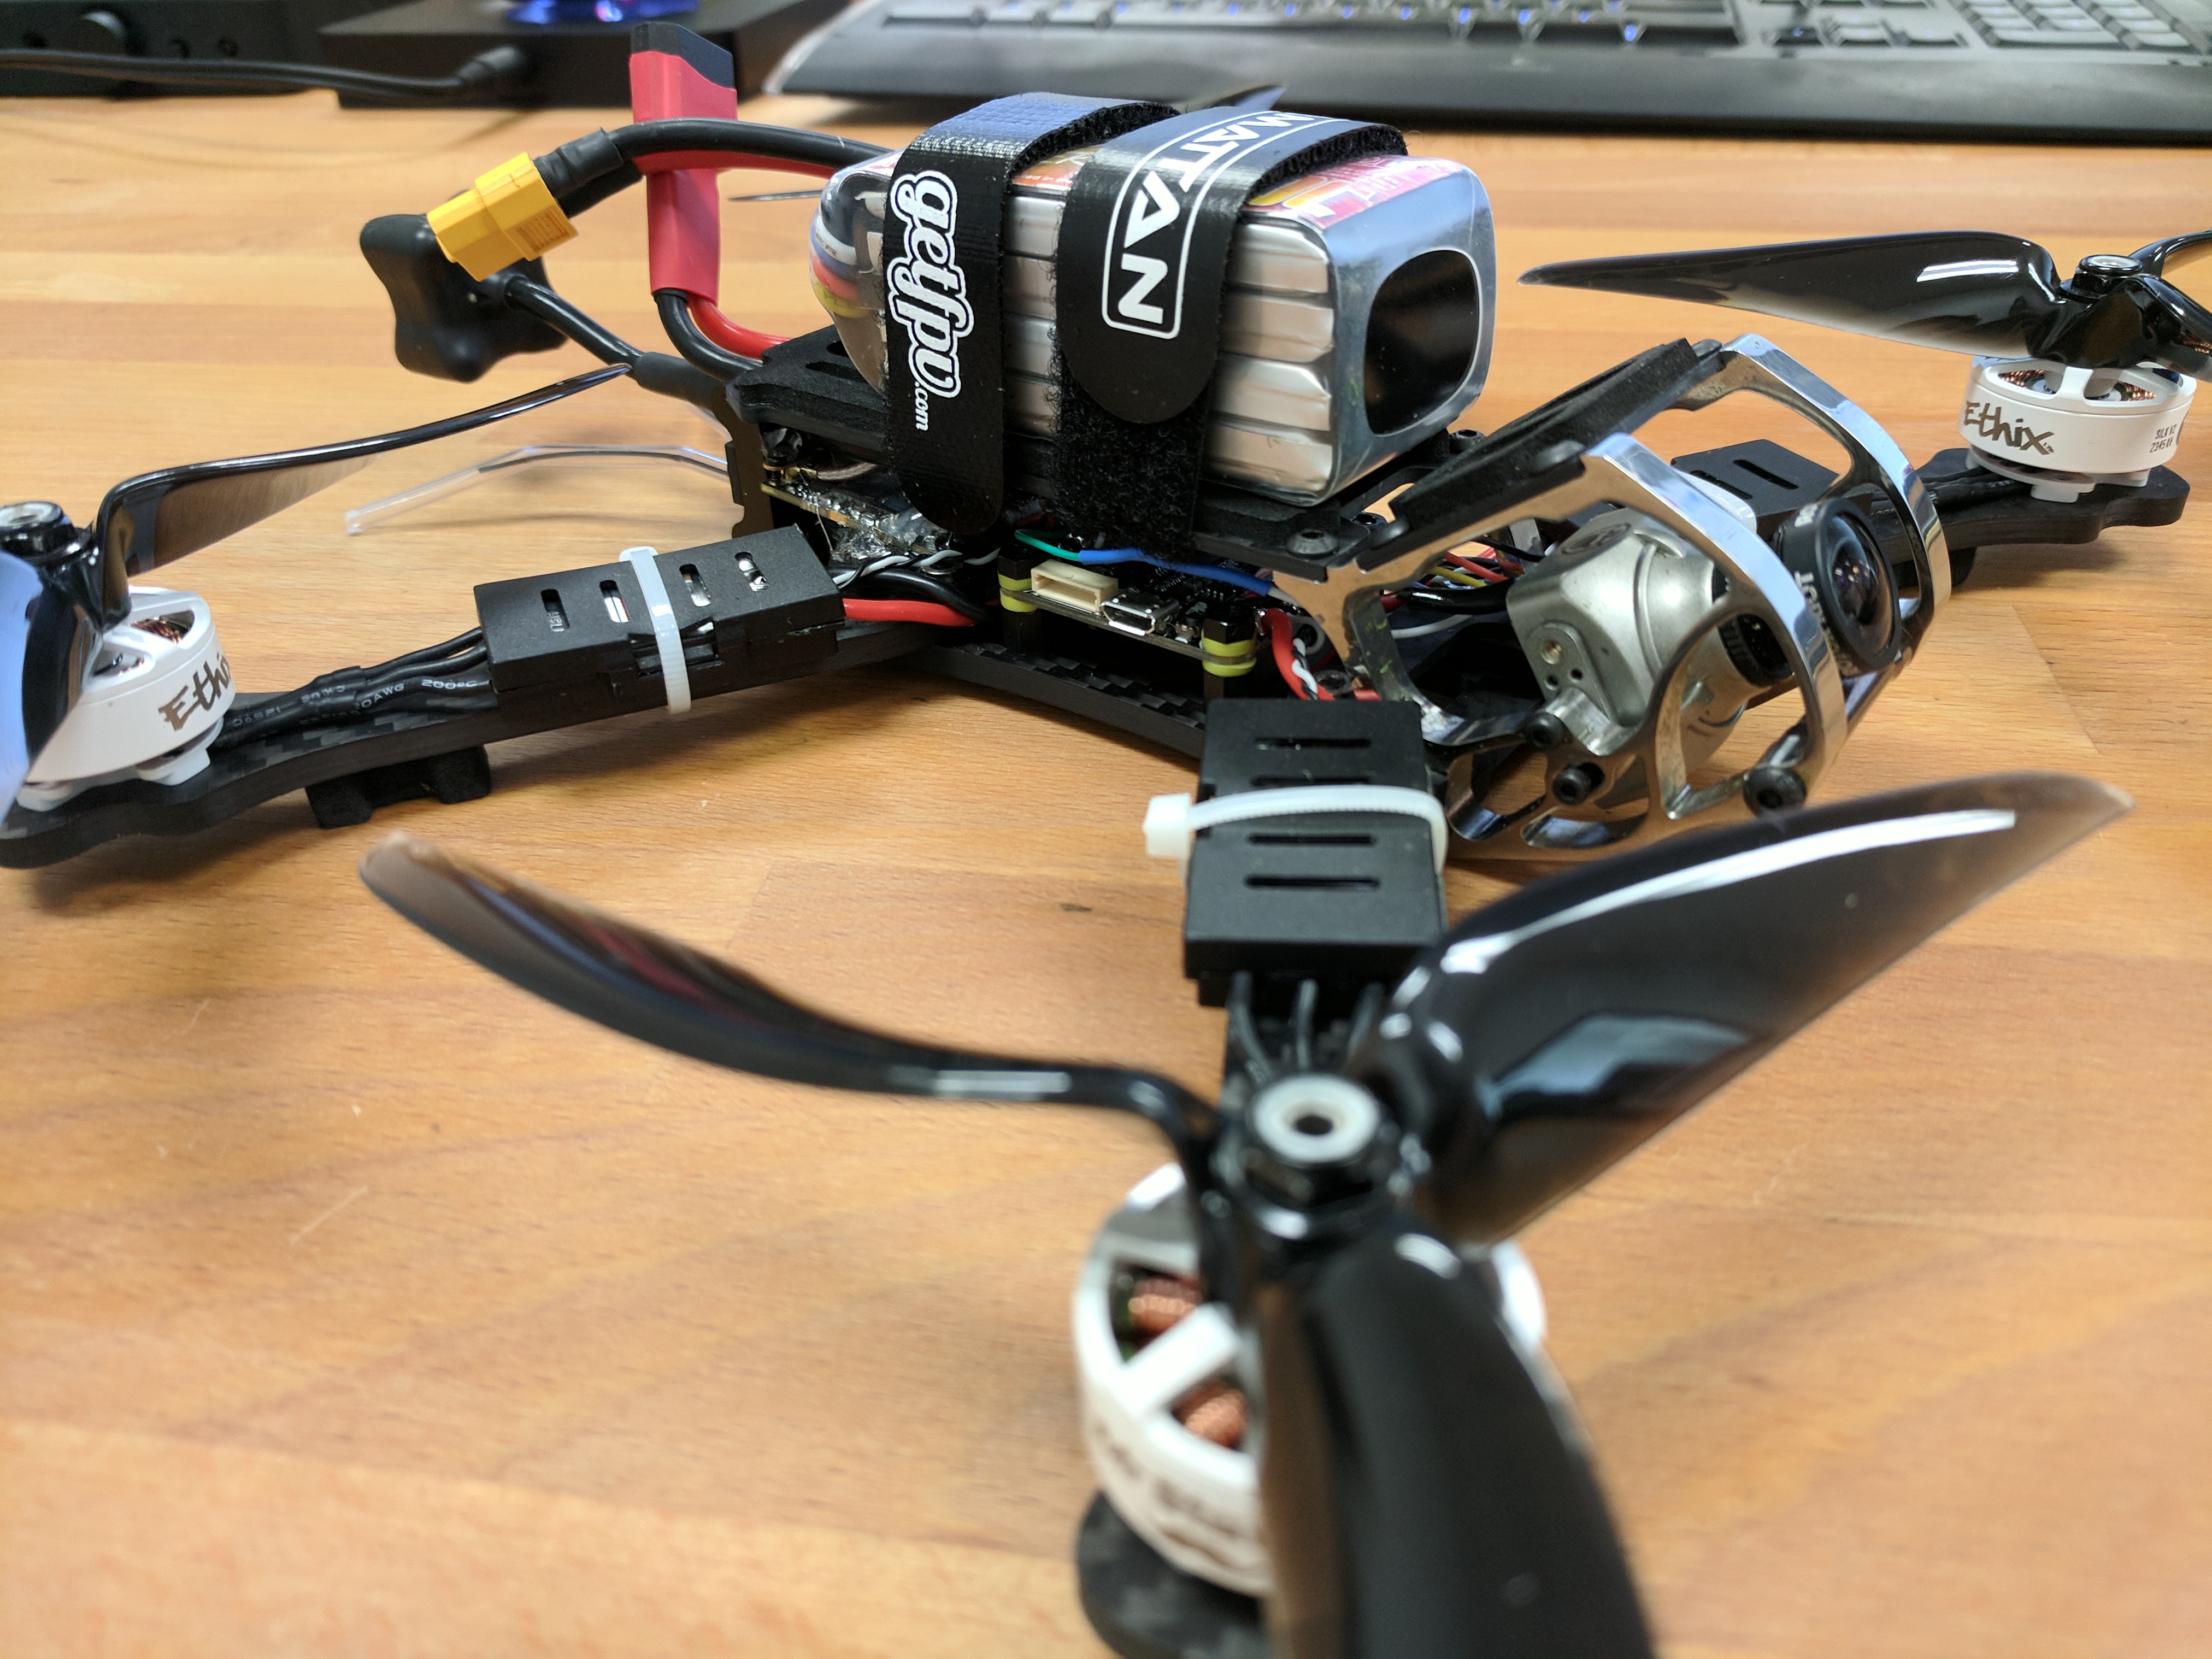
Mounting the Video Transmitter
Again, the Rooster is cramped near its VTX antenna exit, and there was no ideal mounting spot, especially since VTX’s run hot and require plenty airflow. I rotated the camera connector 180 degrees and wedged the VTX between the flight controller and rear antenna plate, then secured with hot glue. Messy but functional.

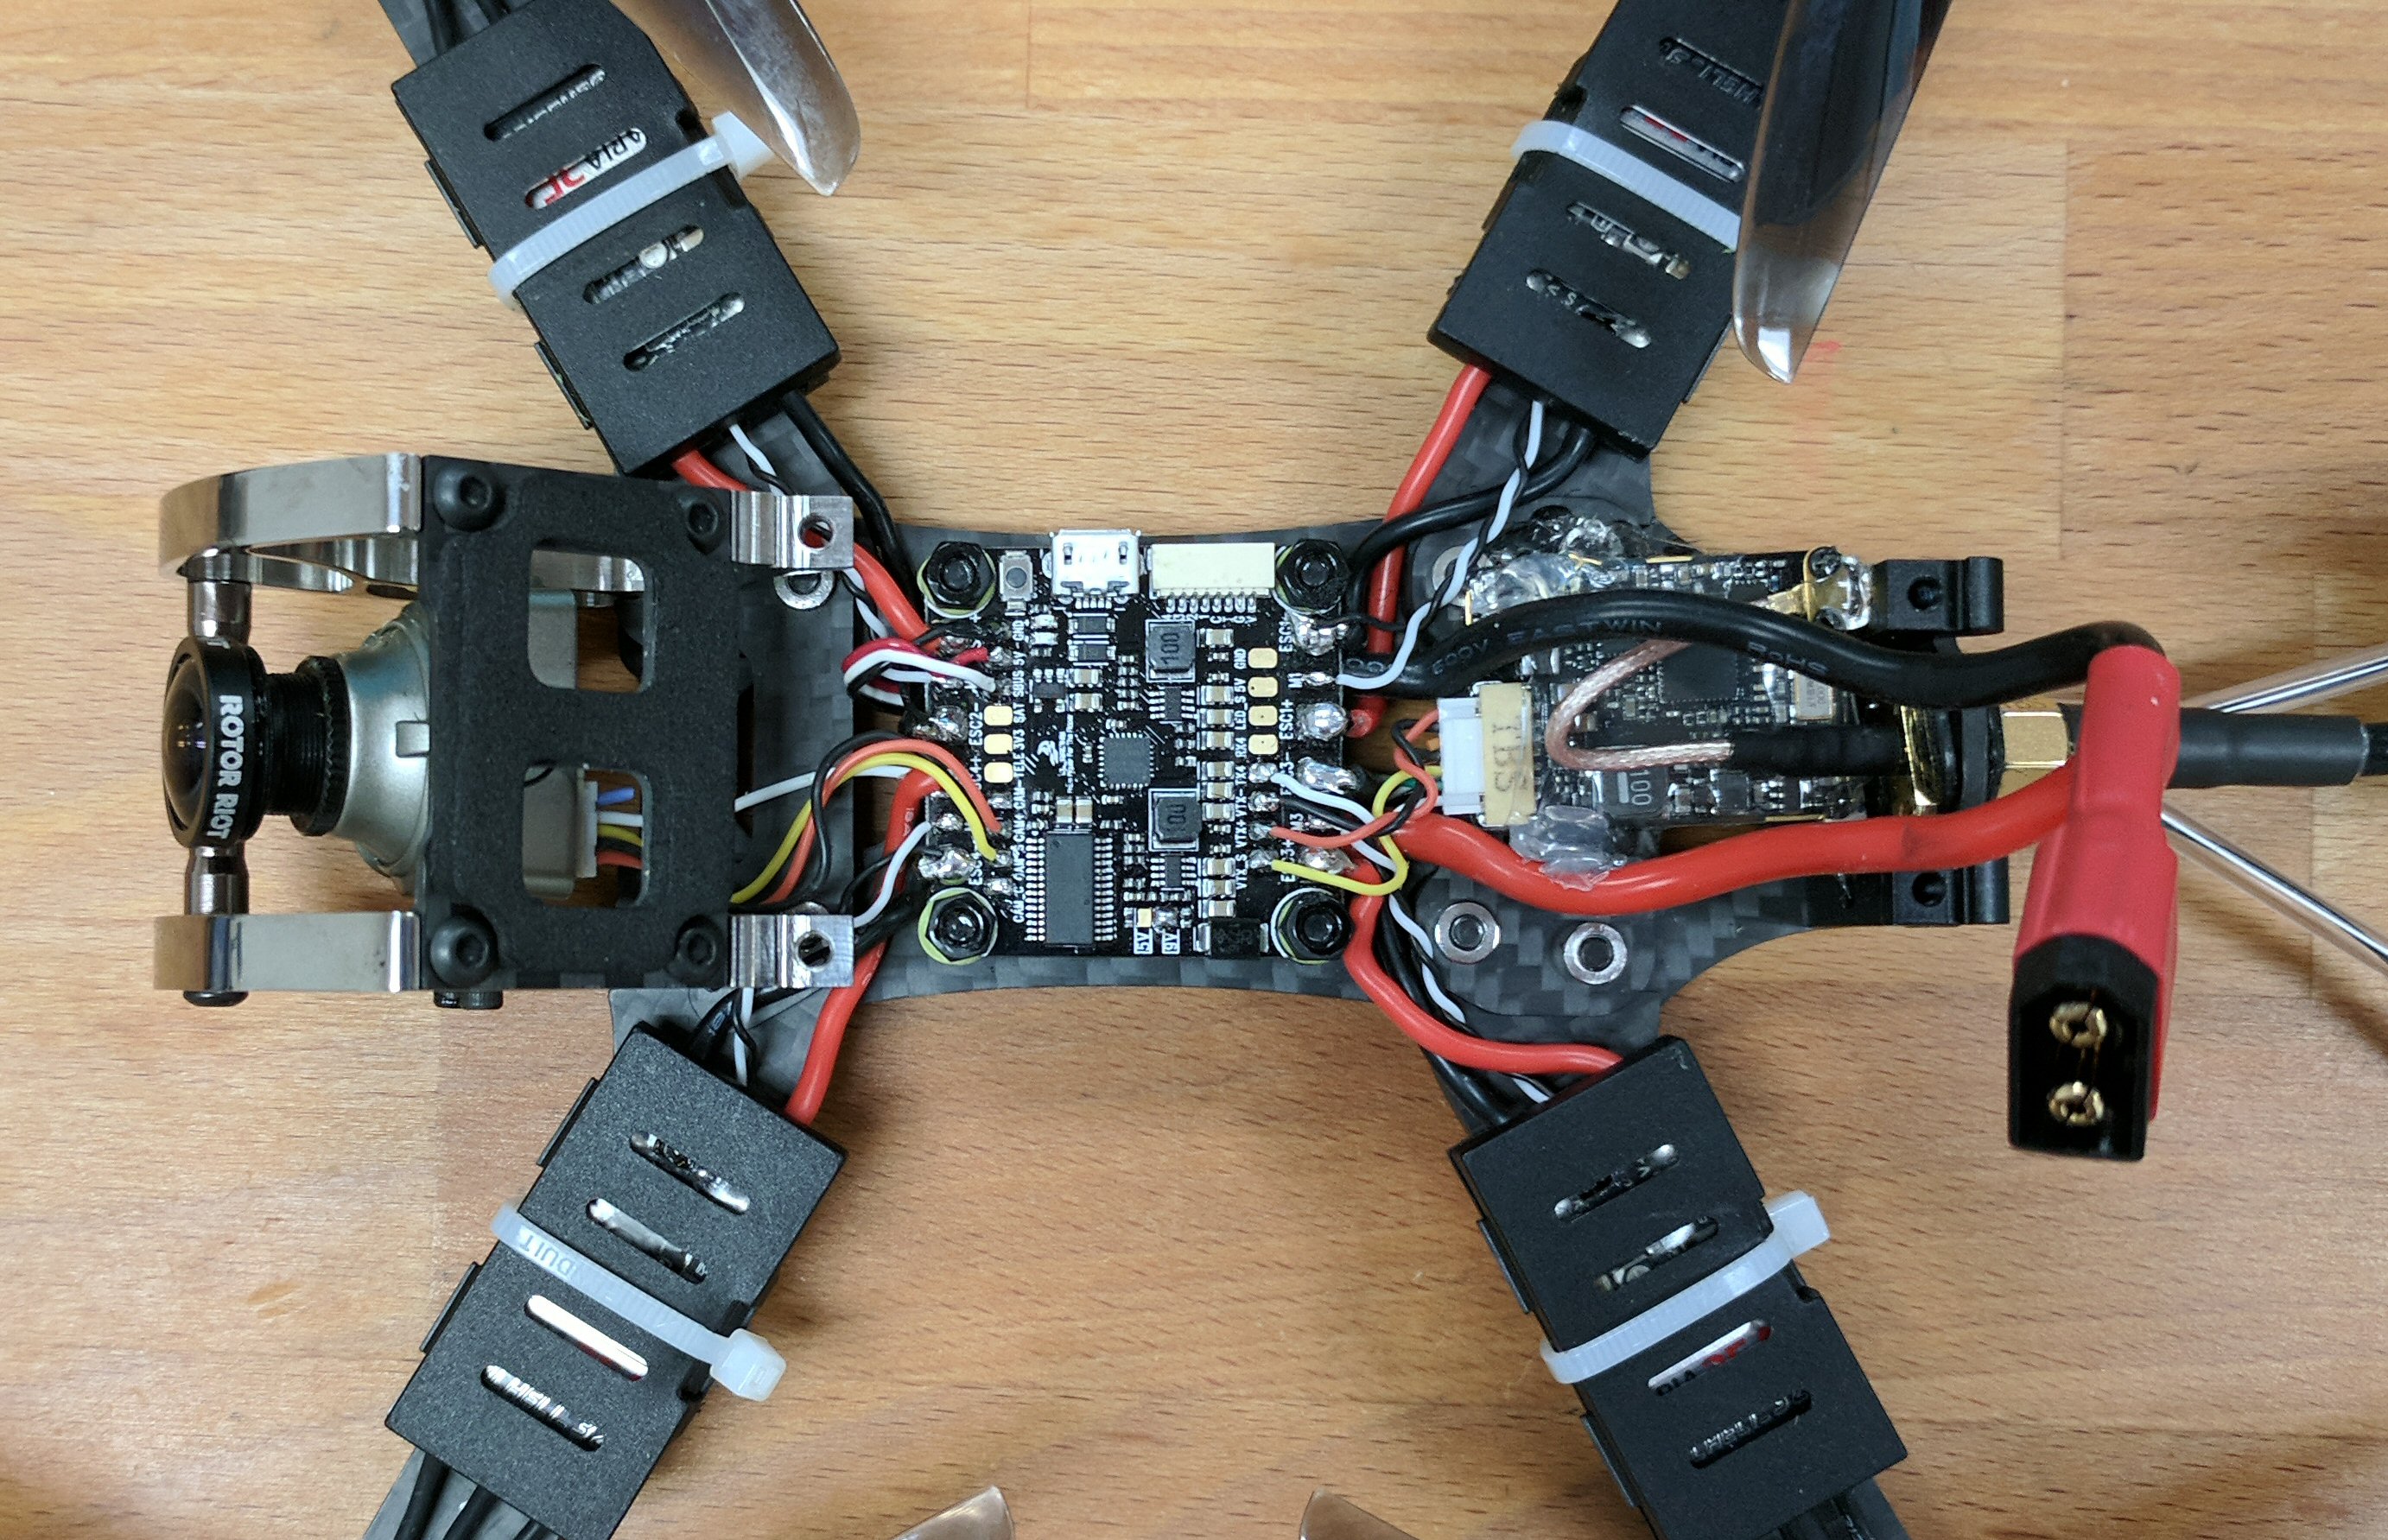
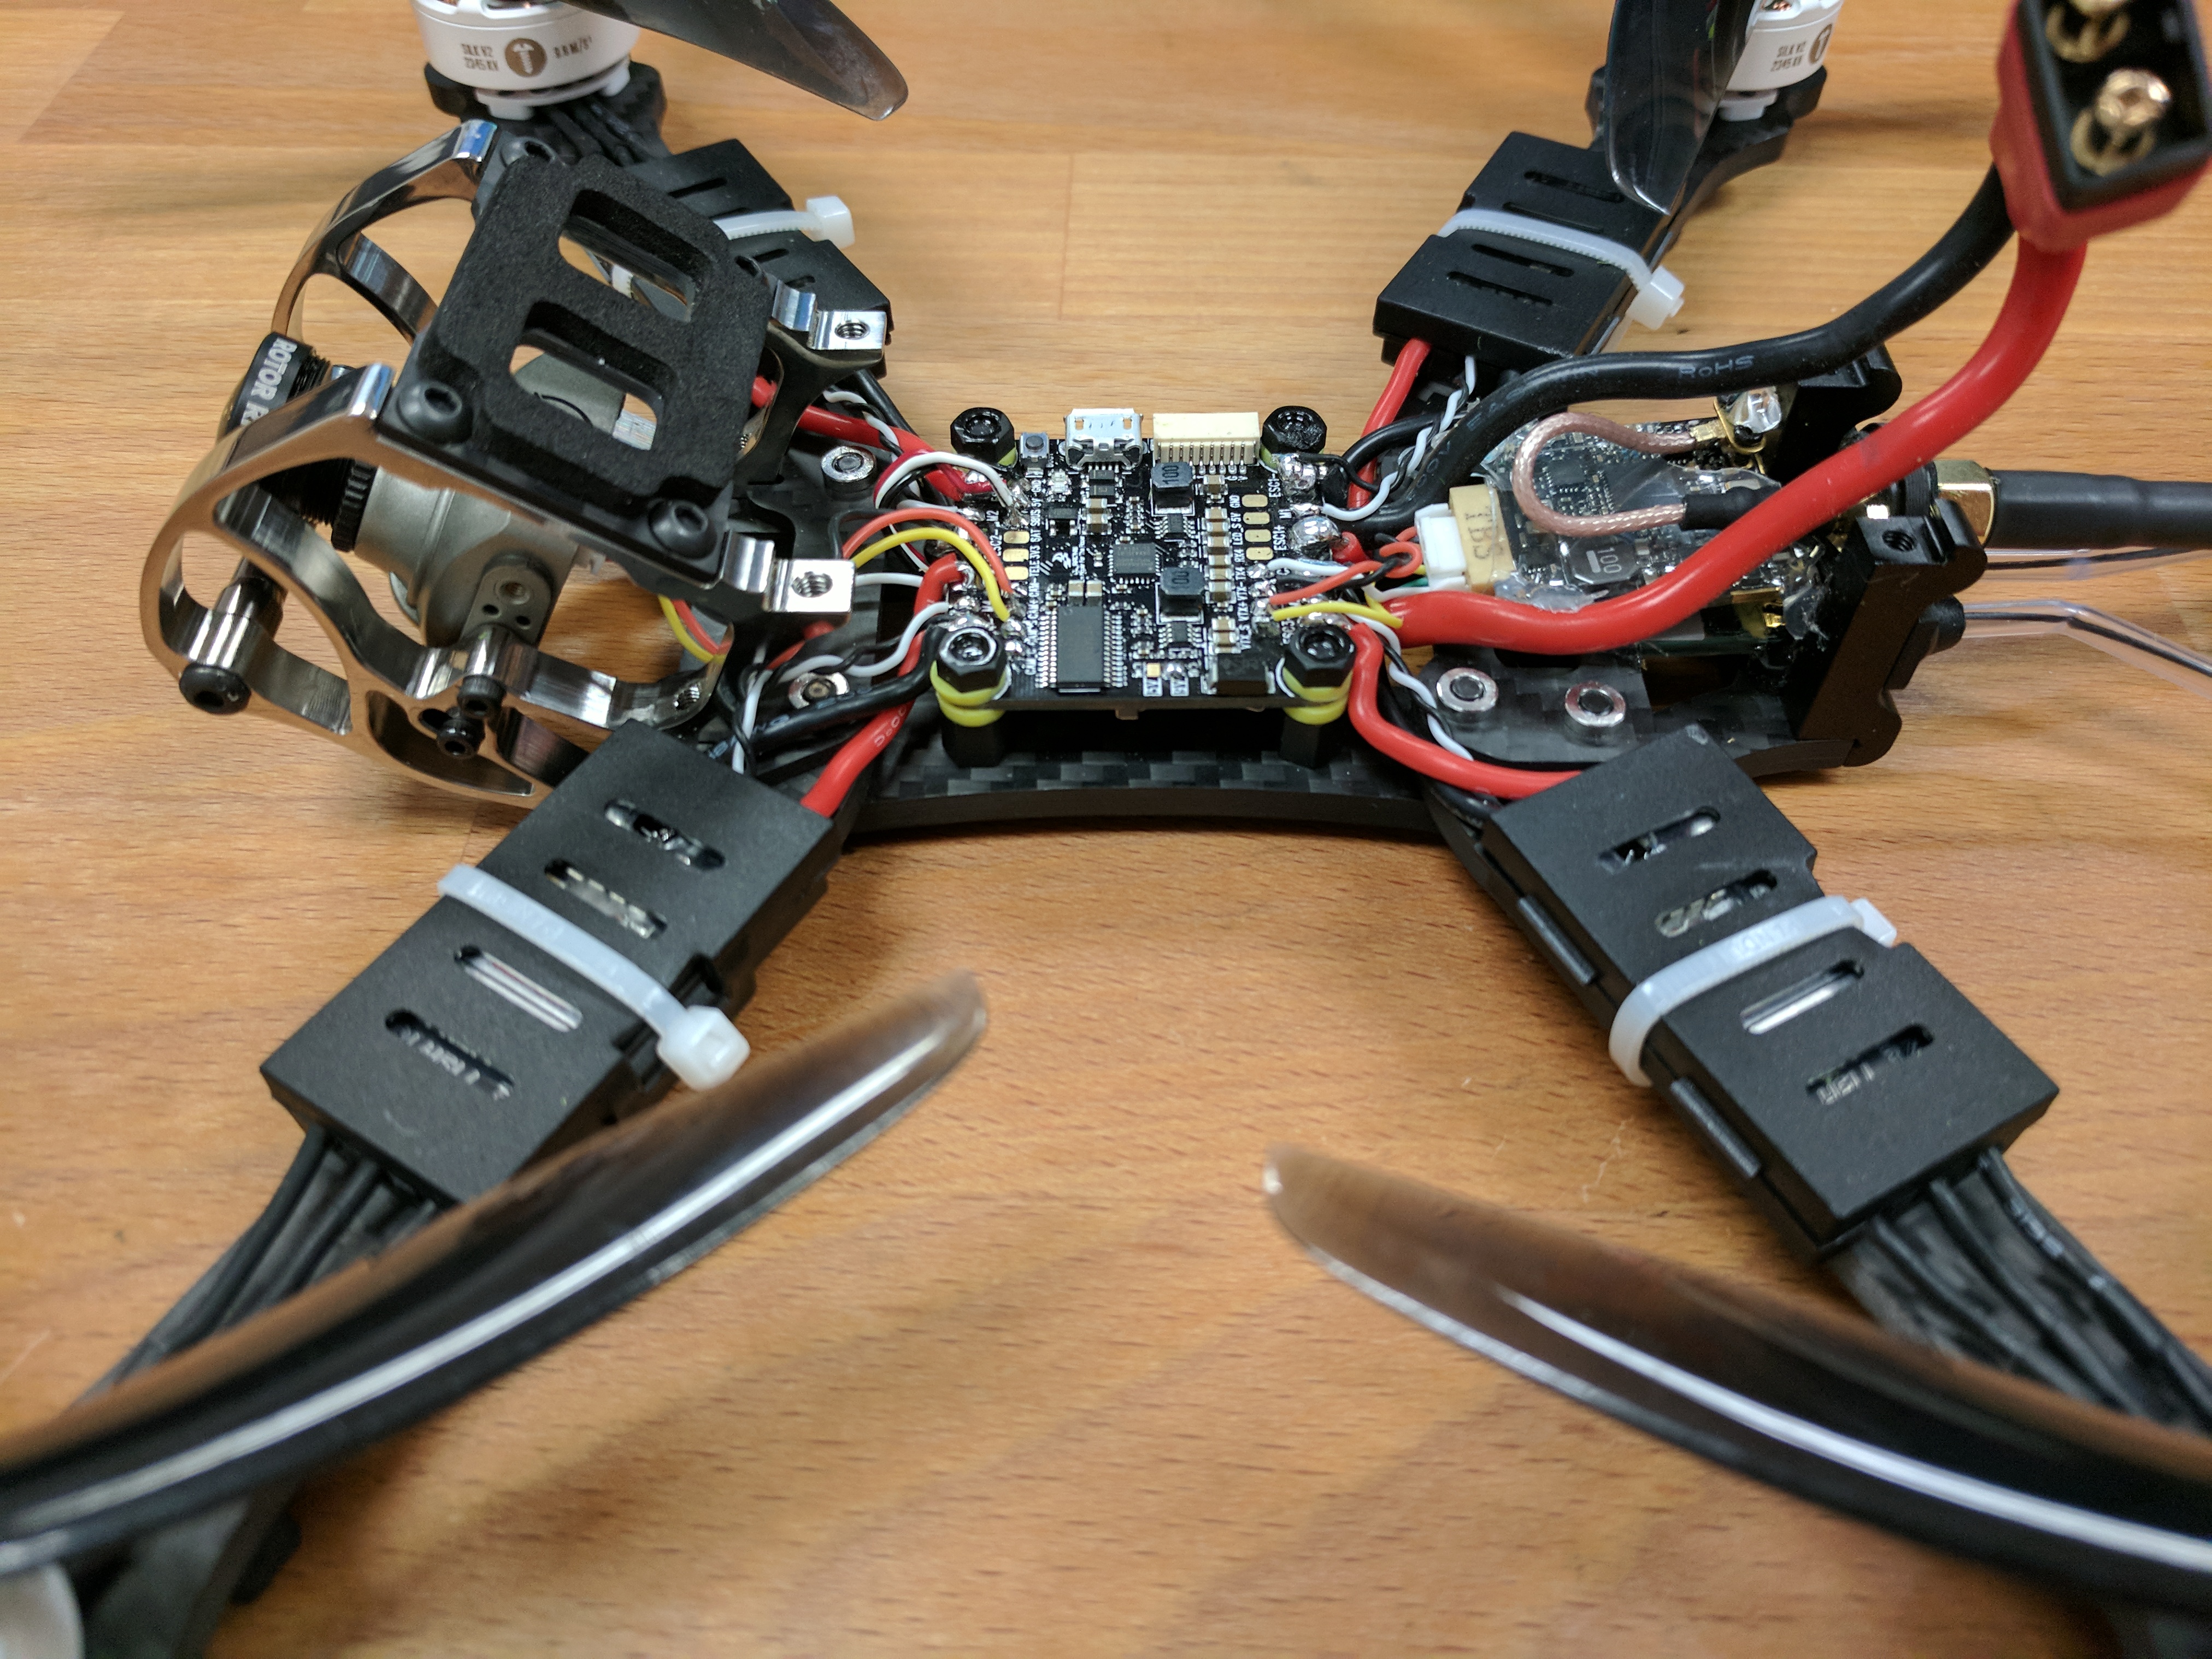

VTX Wiring: With high frequency ICs and ESCs, noise is a given on a drone, and that noise can bleed into the video signal. Ground loops will create moving lines. In a particularly noisy setup, video interference may appear when throttle is applied, or a lack of power to the VTX will produce black lines.
Wiring the VTX directly to the battery and powering the cam from the VTX is generally good advice, but a FC OSD may introduce ground loop.
Based on feedback from other CL Racing F4S owners, and knowing I’ll stick to 25mW VTX power for now, I wired the RunCam and VTX directly to the FC, configured for 9V:
- Runcam Swift 2 connected to F4S at:
CAM_C, CAM_S, CAM+, CAM-, Microphone signal to VTX “Audio” - TBS Unify Pro 5G8 HV connected to F4S at:
VTX_S, VTX+, VTX-, “SmartAudio” to TX4
The microphone signal picks up audible 2.4GHz interference in my house, but is fine outside. Video is clean anyway.
Mounting the ESCs
The CL Racing F4S lacks dedicated ground pads for the ESC signal, so I initially removed the smaller GND wire from each ESC with the intention of wrapping the signal wire around the main supply GND wire:
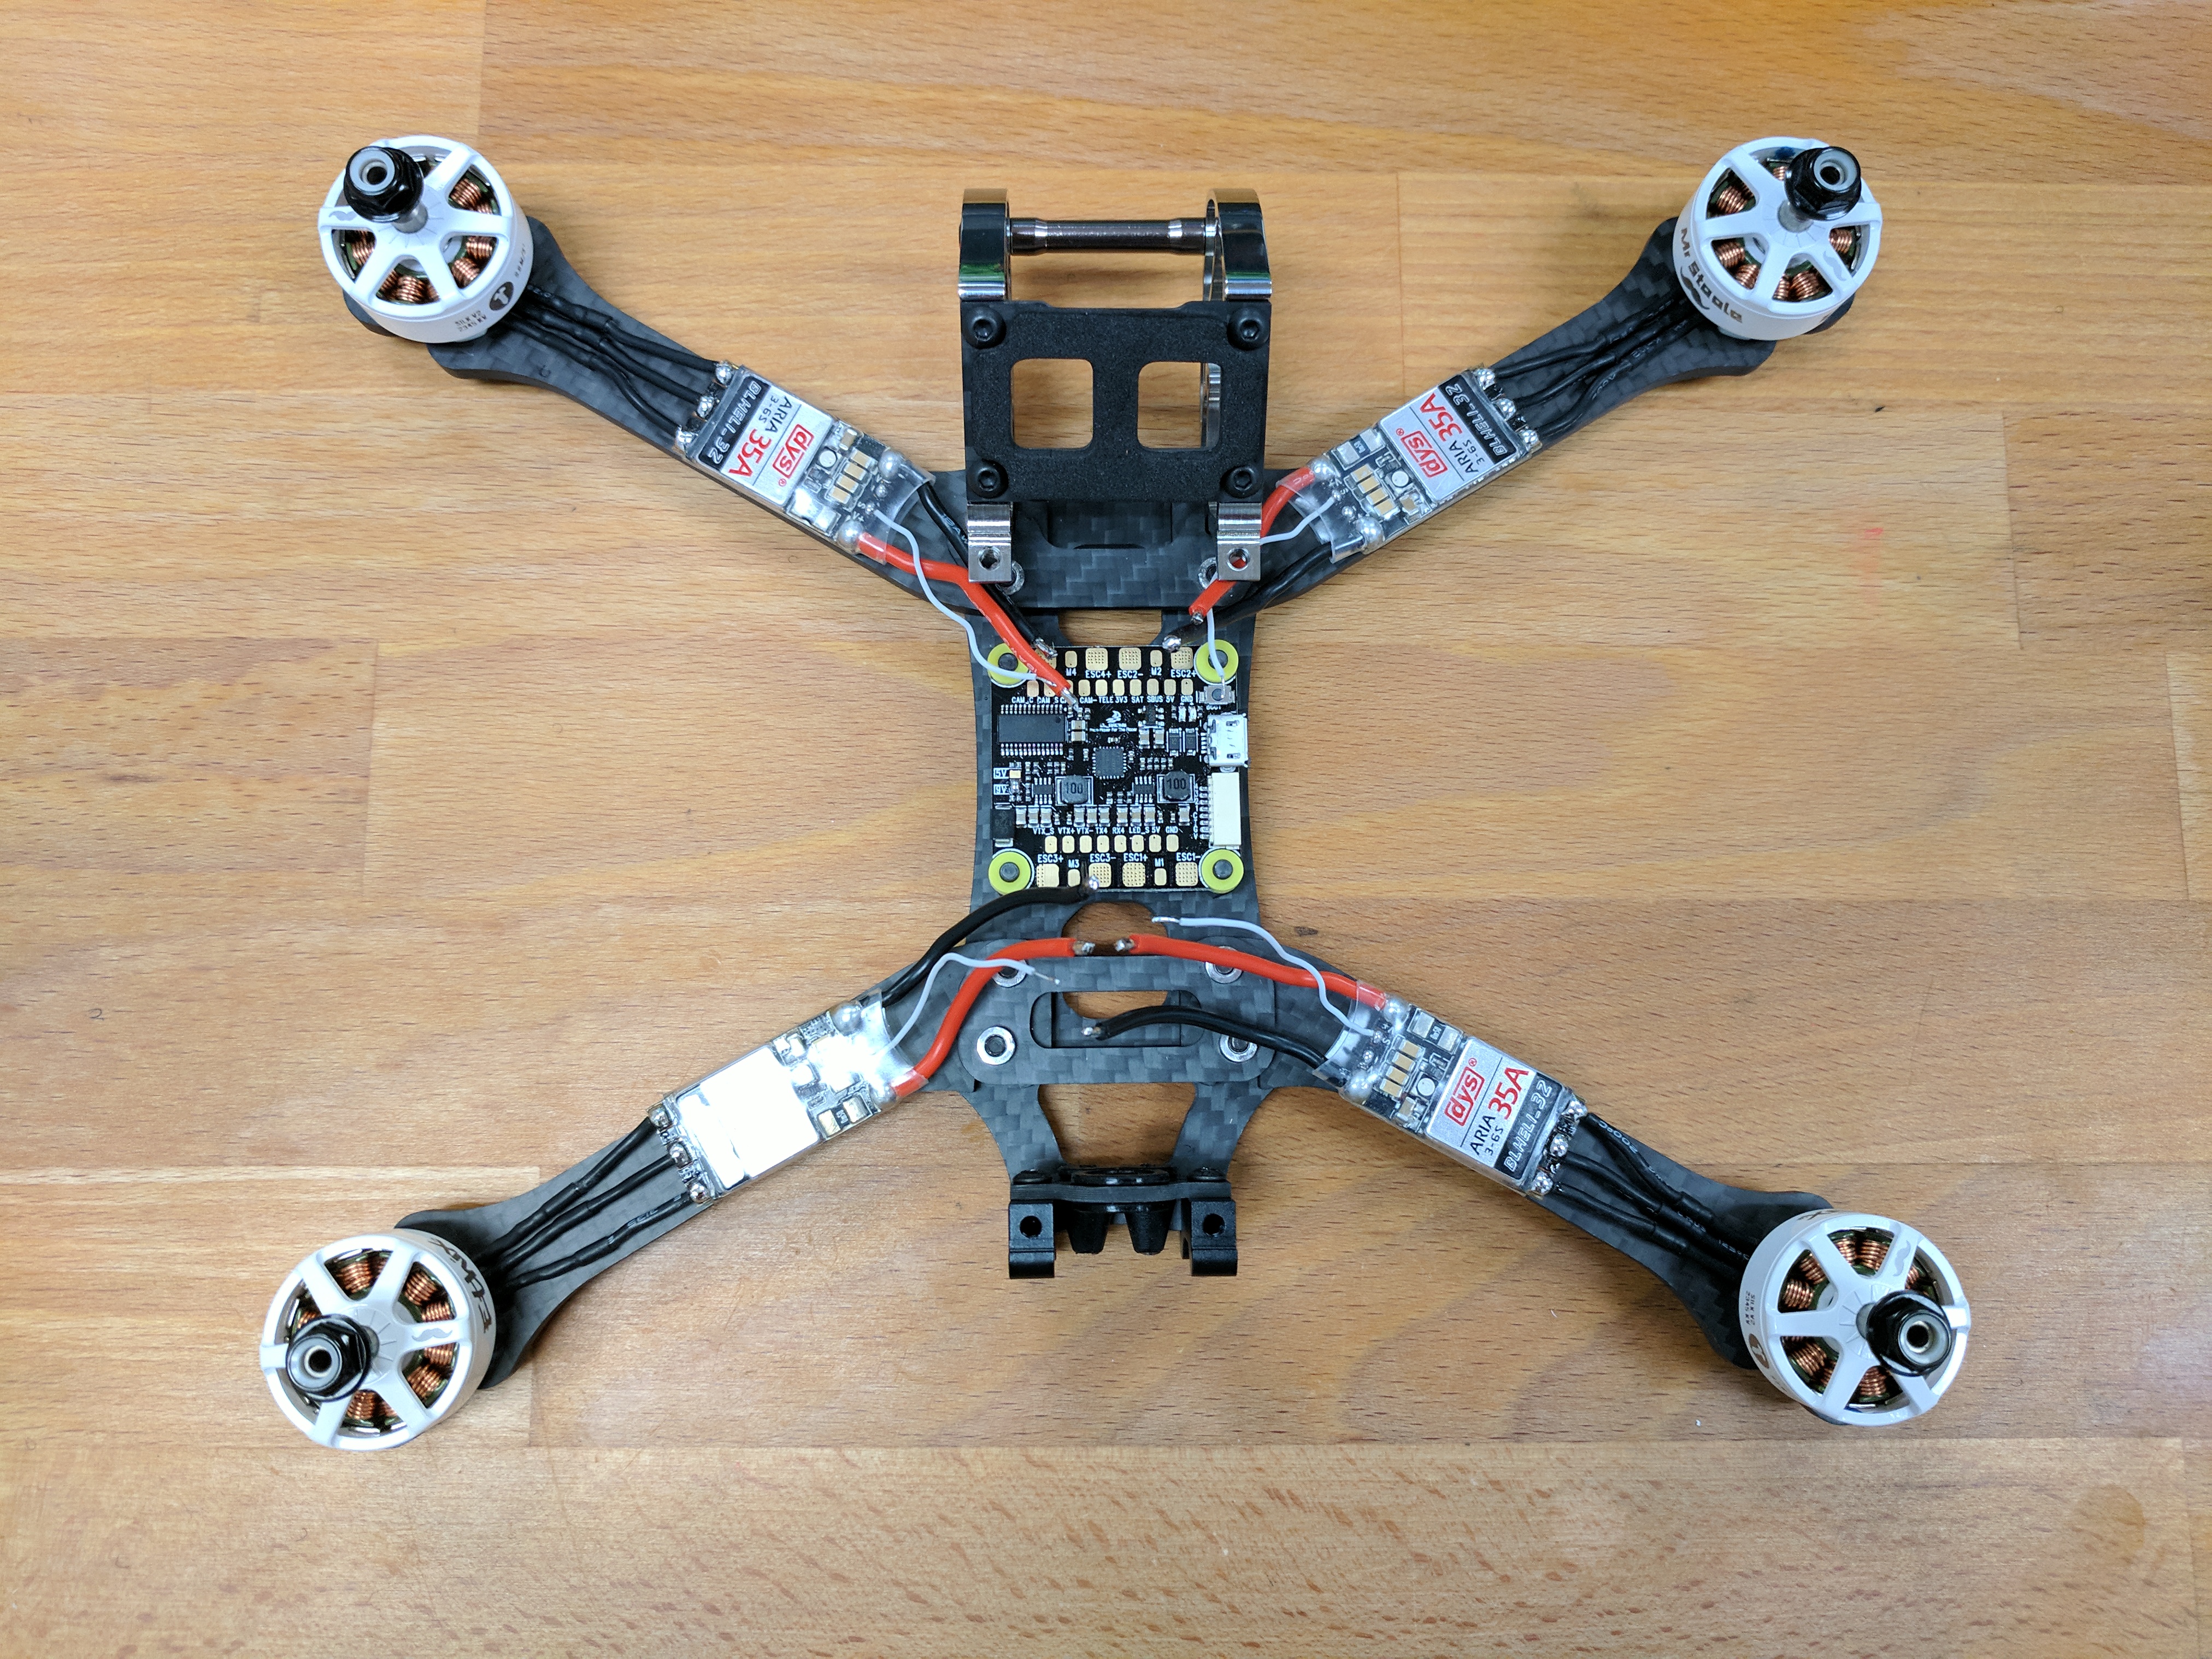
I reversed this decision and reinstalled the smaller ground wires the next day. DYS engineers probably had good reason to spec that wire (current capacity? noise reduction?).
Also, carbon fiber is electrically conductive! DYS includes a plastic enclosure for each ESC, in addition to factory heatshrinking. The motor leads were dangerously close to carbon fiber, so I decided to make use of the plastic enclosures to be safe.
Final Impressions
The Rooster frame feels indestructible and flies like a dream. Special thanks to Austin for helping kick off the Rooster’s maiden flight at Midwest Air Wing RC!
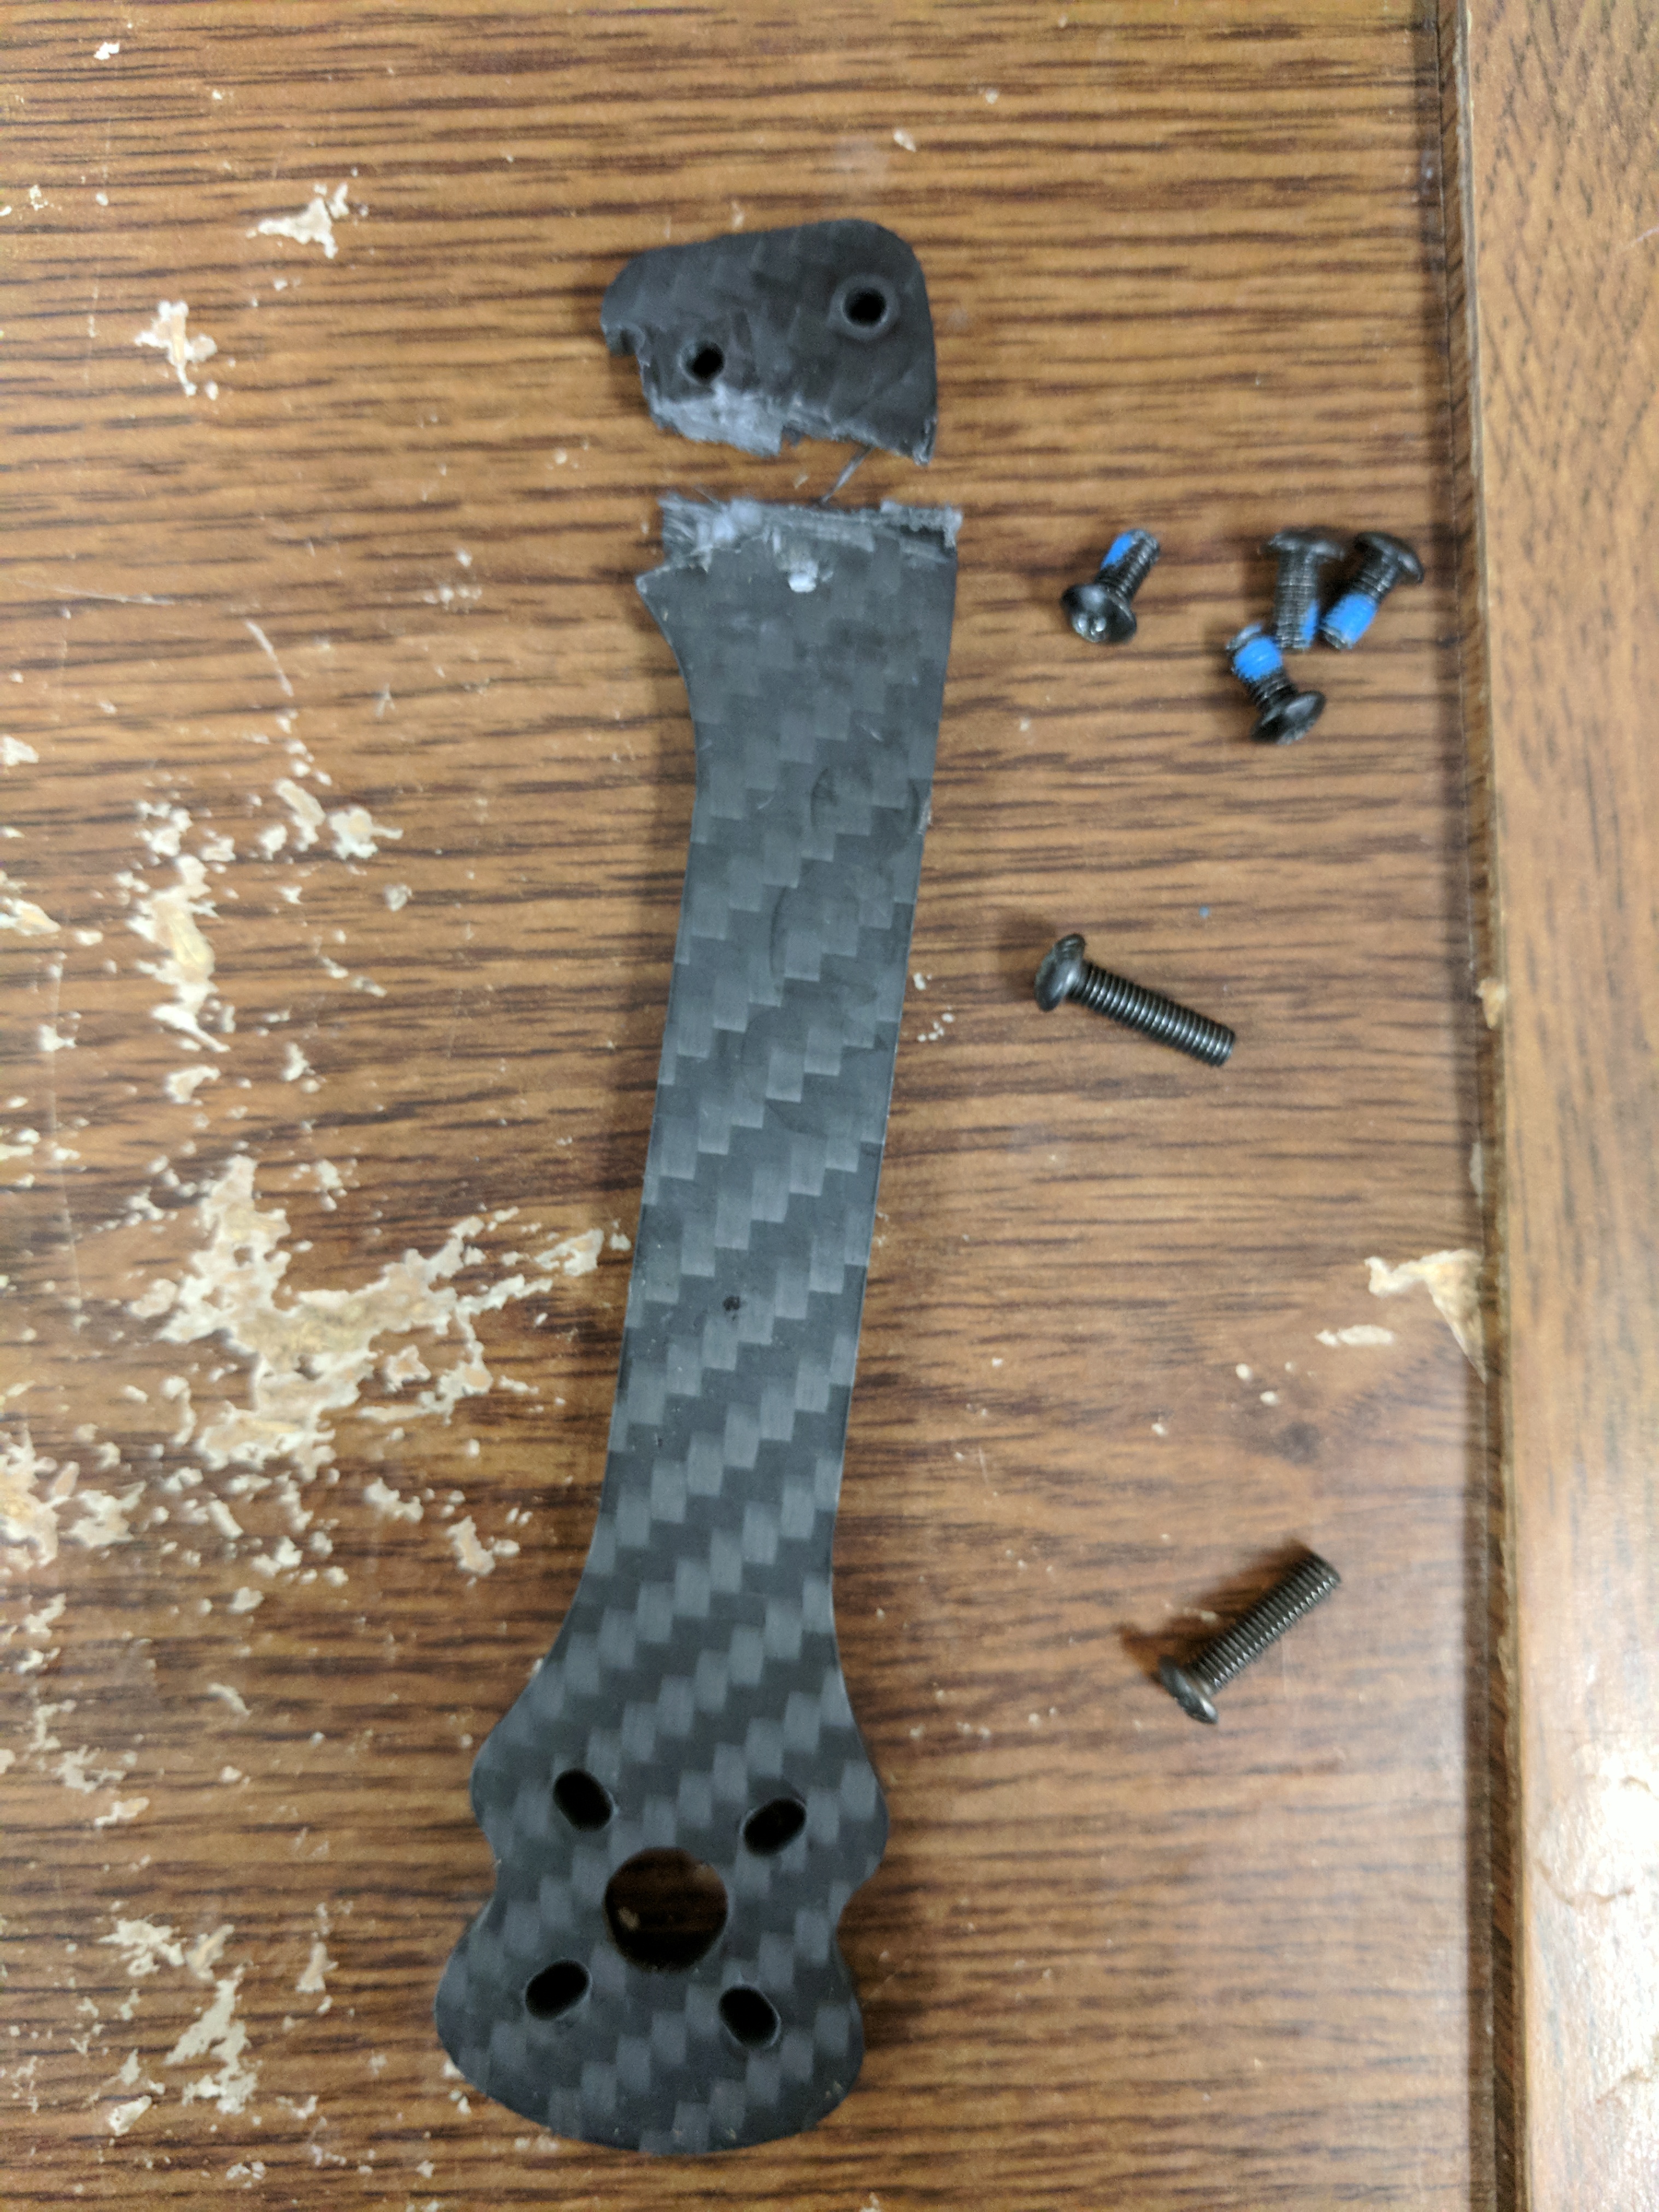
I left this post as a draft while awaiting a GoPro mount. Turns out the Rooster is not indestructible. Not much good comes out of clipping a pole at high velocity. The rooster survived two weeks of heavy abuse.
Armattan is prompt and courteous, and stands by their lifetime warranty. Better yet, replacement parts are available in the US from RaceDayQuads. The Rooster will be back in the air in just two days.